Learn how dry brushing can support lymphatic health, reduce bloat, and refine skin texture in this simple 28-day routine for beginners. Your glow starts here.
The Skin You Forgot You Had
As the weather warms and the winter layers come off, there’s always that moment — you catch a glimpse of your arms or legs and realise you haven’t really seen them in months.
It’s not about vanity; it’s about rediscovery.
For most of us, the skin on our face gets all the attention, while the rest quietly hides under jumpers and jeans, waiting its turn.
That’s why this month’s challenge is all about remembering the rest of you — your arms, legs, shoulders, and back — all the skin that’s been patiently waiting for a little care.
For me, this started as a spring ritual — part reset, part reunion — a way to literally brush off winter and wake my body up again.
(And yes, dry skin brushing really does make you glow — even before the holiday tan.)
This simple 28-day practice takes just a few minutes a day, yet it leaves you feeling more alive, energised, and at home in your own skin.
Jump to RecipeThe very first question to ask is…
Will this Dry Skin Brushing challenge support my well-being?
Is Dry Skin Brushing something that could support your wellbeing needs?
Here are some signs that dry skin brushing could benefit you.
** Dry skin brushing is not performed on the face
- Your skin looks dull – has lost its glow
- Your skin is dry and flaky
- Skin is more oily
- Poor skin texture (feel & appearance i.e. skin bumps) and tone (colour)
- Visible pores and clogged pores
- Ingrowing hair
- Skin breakouts
- Fatigue and tiredness
- Bloating, puffiness & water retention
- Frequent headaches
- Recurring infections such as UTI or colds
- Constipation
**These are good areas (symptoms) to assess and score before you start the challenge
When to avoid skin brushing
Speak to a health professional first if you are currently undergoing immune-system treatments, have ongoing skin infections, psoriasis, eczema, open wounds, burns,skin growths or take topical steroid creams.
What is Dry Skin Brushing?
Full disclosure: There are no scientific studies to back this self care practice.
Claims about reducing cellulite have not been proven…
Now that is out of the way – what do we know about dry skin brushing?
Dry Skin Brushing has been practiced for thousands of years – all around the world
- In Ayurvedic medicine it is called Garshana and traditionally uses a raw–silk or linen sock.
- In Japan it is called Kanpumasatsu and uses a dry towel
- In Chinese Medicine it uses dried fruit fibres such as a Loofah
- The Greek & Romans used copper Strigils
- In Native American medicine it used corn cobs
- In Polynesian cultures they used crushed seashells
- And the Turks and Russians used the popular body brushing method.
Dry Skin Brushing is performed before a shower when the skin is dry. Use a dry towel, brush or loofah and brush over your skin causing a pleasant friction. You only need to do this for a couple of minutes and use a firm but not hard pressure. Then follow with your regular shower routine.
The general rule is to brush towards your heart.
** If your goal is to reduce lymph congestion (Puffy skin) see links below.
Because Dry Skin Brushing can be stimulating it is recommended to do it earlier in the day. Especially if you have sleep issues.
Honestly it is very simple to do (full instructions below) and feels great.

How Does Dry Skin Brushing Work?
When you brush your dry skin, you loosen dead skin cells, so that they can be washed off and reveal new, smooth and brighter skin cells.
Dry skin brushing is a form of exfoliation speeding up the process of shedding old skin cells. It is thought that regular exfoliation improves skin texture and tone i.e. pink bumpy skin and enhances body lotion/product absorption.
Another aspect of detoxification is your Lymphatic system. This is like a slow moving canal carrying waste out of the body – that relies on body movement to squeeze it along the body . Old time healers believed dry skin brushing encouraged movement of the Lymph.
Dry Skin brushing can be helpful as a regular practice if you are unable to be active most of the day. This might result in relief of puffiness and water retention much like massage.
Dry Skin Brushing also activates nerve endings in the skin which is what creates that pleasant tingling and invigorating sensation.
Preparing for your Challenge
Luckily this self care practice is simple to prepare.
You can use any of the following;
- An existing body towel (not too soft!) long enough to do your back
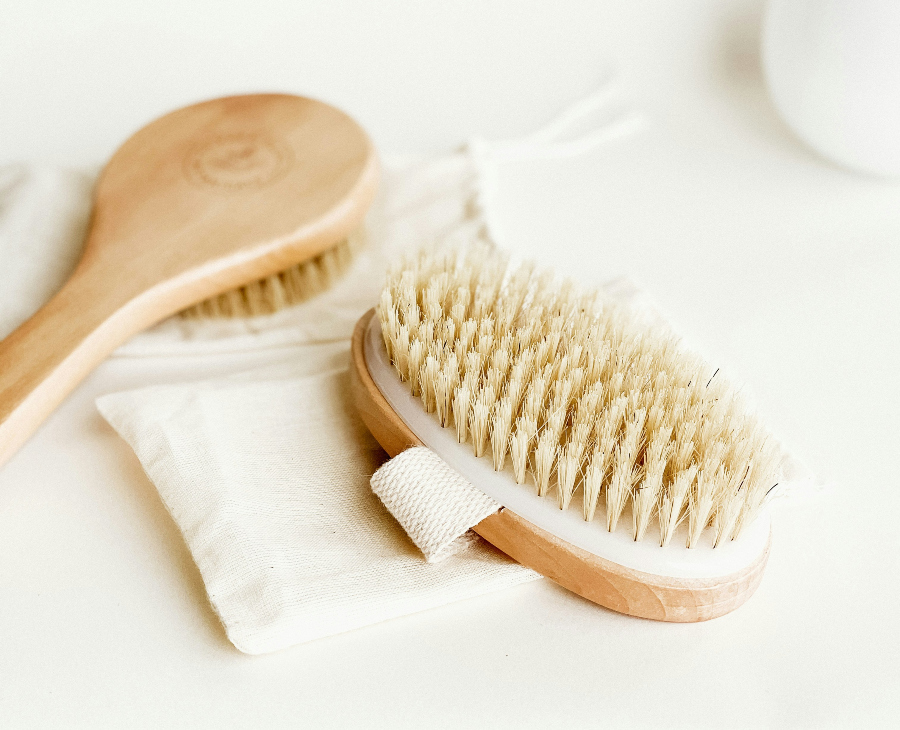
- A Dry Skin Brush with natural bristles (detachable handles are handy!)
- A Loofah
Optionally you can dive deeper in which type of Dry Skin Brush to use HERE
You will also need to capture details about your before and after assessments and tracking sheets to help you stay consistent.
How to do the Challenge
For the challenge you only have to do the basic routine at least 3 times a week for 4 weeks (28 days). * You can choose to skin brush every day
Assess and score your overall well-being – especially those areas mentioned at the start of this article – before you begin and again when you complete the dry skin brushing challenge.
Remember you can use either a dry towel, special dry skin brush or loofah
Basic Routine
- Start from your feet and brush upwards in long sweeps along the front, back and sides of your legs. Include your buttocks. Medium pressure.
- Then go from your hands to your shoulder in the same manner. Don’t forget the back of your neck!
- Use a circular (anticlockwise to mimic the colon and aid the process) movement across your abdomen and then for your armpits.
- When it comes to your back, I always go upwards in short strokes from the base of my back and downward strokes from my shoulders. Don’t forget your sides under your arms which I do in short strokes.
- I go very gently if at all, over my chest area and avoid my face
It should take less than 5-minutes.
I have never followed a set number of times to brush each area or complete the routine – my routine is more intuitive.
Once is fine but if you intuitively feel that you want to do more – do! Remember the benefit comes from repeating the routine 3 times a week for 4 weeks.
Start with a mild pressure – this should not make the skin red and irritated.
Notice how you feel when you have completed your dry skin brush. It should feel good!
Then have your shower as normal.
Tweak the Dry Skin Brushing Challenge to Your Needs
Following the basic routine 3 times a week is enough to see results.
You can also choose to dry skin brush every day. I would not do it more than once a day.
You can also tweak the routine to your needs. If dry skin brushing makes your skin very irritated try a softer pressure or material.
There are detailed routines that work more closely with your lymphatic system which a naturopath might advise to support specific health conditions.
And of course you can leave out certain areas of your body if you need to.
Advanced Skin Brushing
What if you want to focus mainly on your lymphatic system with dry skin brushing?
I like to combine dry skin brushing with a manual lymphatic drainage routine to open up my lymph nodes first ** Simple challenge coming soon.
You might find it interesting to check out this dry skin brushing technique for lymph movement HERE
Drinking enough water and daily movement will work really well with dry skin brushing.
Assessing your Dry Skin Brushing Challenge Results
At the end of the 28-days you complete another assessment.
What differences did you notice? Write them down.
I just like how good dry skin brushing feels and how soft my skin feels afterwards and I also know I am helping my body detox better.
How about you? Is this self care practice something you will include in your regular self care menu?
Conclusion
Congratulations on completing your 5 Minutes to Feel Good in Your Skin: A 28-Day Dry Brushing Challenge!
I hope you’ve found this practice helpful, energising, and maybe even a little bit joyful.
After all, it’s not just about smoother skin — it’s about remembering the rest of you that’s been hiding under those winter layers.
And remember, one month is only the beginning.
Self-care — like glowing skin — builds with consistency. So keep brushing, keep noticing, and keep showing up for your body in these small, simple ways.
Because feeling good in your skin isn’t a quick fix — it’s a relationship that gets better the more time you spend together.

Want to make these ideas work for your body?
Self-care practices and routines are only the beginning. Learning how your body responds when you follow them helps you decide when to keep going, when to adjust, and when to move on.
Explore the free Make Self-Care Simple resources to begin understanding your own patterns.
→ Start with the Free Resources
Make Self Care Simple shares general self-care education for inspiration only. I’m not providing medical advice — always check what’s right for you with a qualified health professional.
©2025 Make Self Care Simple.
Print or save a summary of this challenge in the handy Challenge ‘Recipe’.
5 Minutes to Feel Good in Your Skin
Equipment
- 1 Towel
- 1 Dry skin brush Optional
- 1 Loofah Optional
Notes
How to do the Dry Skin Brushing Challenge
For the challenge you only have to do the basic dry skin brushing routine at least 3 times a week for 4 weeks (28 days). Assess and score your overall well-being – especially those areas mentioned at the start of this article – before you begin and again when you complete the dry skin brushing challenge. You can use a dry towel, dry skin brush or loofah. Basic Dry Skin Brushing Routine- Start from your feet and brush upwards in long sweeps along the front, back and sides of your legs. Include your buttocks. Medium pressure.
- Then go from your hands to your shoulder in the same manner. Don’t forget the back of your neck!
- Use a circular (anticlockwise to mimic the colon and aid the process) movement across your abdomen and then for your armpits.
- When it comes to your back, I always go upwards in short strokes from the base of my back and downward strokes from my shoulders. Don’t forget your sides under your arms which I do in short strokes.
- I go very gently if at all, over my chest area and avoid my face