Tag

Fatigue

Browsing

Learn how dry brushing can support lymphatic health, reduce bloat, and refine skin texture in this simple 28-day routine for beginners. Your glow starts here.

The Skin You Forgot You Had

As the weather warms and the winter layers come off, there’s always that moment — you catch a glimpse of your arms or legs and realise you haven’t really seen them in months.

It’s not about vanity; it’s about rediscovery.
For most of us, the skin on our face gets all the attention, while the rest quietly hides under jumpers and jeans, waiting its turn.

That’s why this month’s challenge is all about remembering the rest of you — your arms, legs, shoulders, and back — all the skin that’s been patiently waiting for a little care.

For me, this started as a spring ritual — part reset, part reunion — a way to literally brush off winter and wake my body up again.
(And yes, dry skin brushing really does make you glow — even before the holiday tan.)

This simple 28-day practice takes just a few minutes a day, yet it leaves you feeling more alive, energised, and at home in your own skin.

Jump to Recipe

The very first question to ask is…

Will this Dry Skin Brushing challenge support my well-being?

Is Dry Skin Brushing something that could support your wellbeing needs?

Here are some signs that dry skin brushing could benefit you. 

** Dry skin brushing is not performed on the face

  • Your skin looks dull – has lost its glow
  • Your skin is dry and flaky
  • Skin is more oily
  • Poor skin texture (feel & appearance i.e. skin bumps) and tone (colour)
  • Visible pores and clogged pores
  • Ingrowing hair
  • Skin breakouts
  • Fatigue and tiredness
  • Bloating, puffiness & water retention
  • Frequent headaches
  • Recurring infections such as UTI or colds
  • Constipation

**These are good areas (symptoms) to assess and score before you start the challenge

When to avoid skin brushing

Speak to a health professional first if you are currently undergoing immune-system  treatments, have ongoing skin infections, psoriasis, eczema, open wounds, burns,skin growths or take topical steroid creams.

What is Dry Skin Brushing?

Full disclosure: There are no scientific studies to back this self care practice.

Claims about reducing cellulite have not been proven…

Now that is out of the way – what do we know about dry skin brushing?

Dry Skin Brushing has been practiced for thousands of years – all around the world

  • In Ayurvedic medicine it is called Garshana and traditionally uses a rawsilk or linen sock.
  • In Japan it is called Kanpumasatsu and uses a dry towel
  • In Chinese Medicine it uses dried fruit fibres such as a Loofah
  • The Greek & Romans used copper Strigils
  • In Native American medicine it used corn cobs
  • In Polynesian cultures they used crushed seashells 
  • And the Turks and Russians used the popular body brushing method.

Dry Skin Brushing is performed before a shower when the skin is dry. Use a dry towel, brush or loofah and brush over your skin causing a pleasant friction. You only need to do this for a couple of minutes and use a firm but not hard pressure. Then follow with your regular shower routine.

The general rule is to brush towards your heart.

** If your goal is to reduce lymph congestion (Puffy skin) see links below.

Because Dry Skin Brushing can be stimulating it is recommended to do it earlier in the day. Especially if you have sleep issues.

Honestly it is very simple to do (full instructions below) and feels great.
How Does Dry Skin Brushing Work?

When you brush your dry skin, you loosen dead skin cells, so that they can be washed off and reveal new, smooth and brighter skin cells. 

Dry skin brushing is a form of exfoliation speeding up the process of shedding old skin cells. It is thought that regular exfoliation improves skin texture and tone i.e. pink bumpy skin and enhances body lotion/product absorption.

Another aspect of detoxification is your Lymphatic system. This is like a slow moving canal carrying waste out of the body – that relies on body movement to squeeze it along the body . Old time healers believed dry skin brushing encouraged movement of the Lymph. 

Dry Skin brushing can be helpful as a regular practice if you are unable to be active most of the day. This might result in relief of puffiness and water retention much like massage.

Dry Skin Brushing also activates nerve endings in the skin which is what creates that pleasant tingling and invigorating sensation.

Preparing for your Challenge

Luckily this self care practice is simple to prepare.

You can use any of the following;

  • An existing body towel (not too soft!) long enough to do your back
  • A Dry Skin Brush with natural bristles (detachable handles are handy!)
  • A Loofah

Optionally you can dive deeper in which type of Dry Skin Brush to use HERE
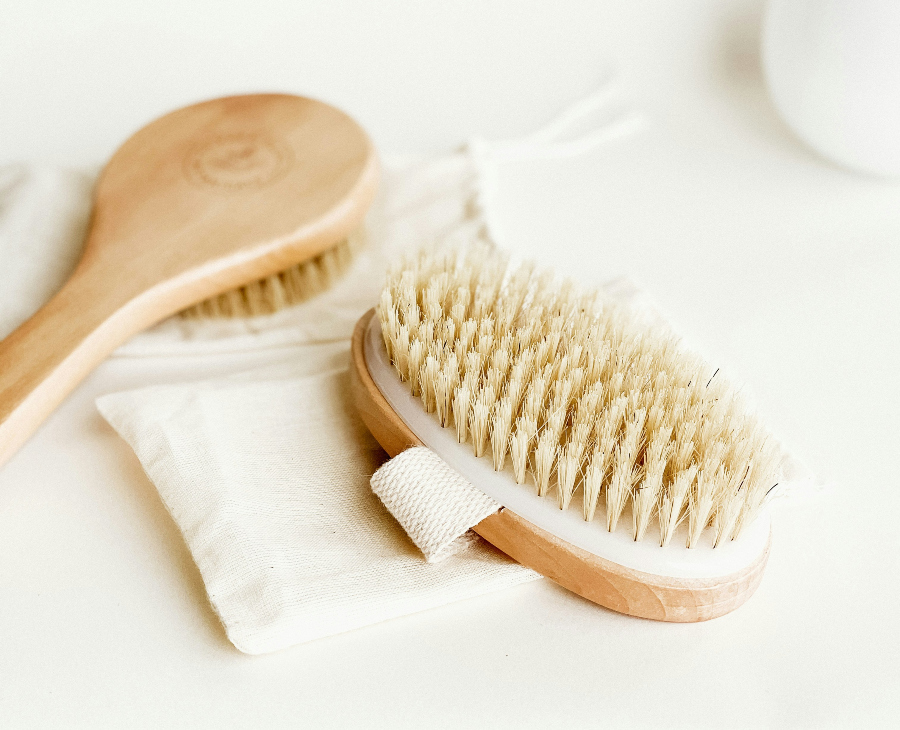
dry skin brushes

You will also need to capture details about your before and after assessments and tracking sheets to help you stay consistent.

How to do the Challenge

For the challenge you only have to do the basic routine at least 3 times a week for 4 weeks (28 days). * You can choose to skin brush every day

Assess and score your overall well-being – especially those areas mentioned at the start of this article – before you begin and again when you complete the dry skin brushing challenge. 

Remember you can use either a dry towel, special dry skin brush or loofah

Basic Routine

  • Start from your feet and brush upwards in long sweeps along the front, back and sides of your legs. Include your buttocks. Medium pressure.
  • Then go from your hands to your shoulder in the same manner. Don’t forget the back of your neck!
  • Use a circular (anticlockwise to mimic the colon and aid the process) movement across your abdomen and then for your armpits.
  • When it comes to your back, I always go upwards in short strokes from the base of my back and downward strokes from my shoulders. Don’t forget your sides under your arms which I do in short strokes.
  • I go very gently if at all, over my chest area and avoid my face

It should take less than 5-minutes.

I have never followed a set number of times to brush each area or complete the routine – my routine is more intuitive. 

Once is fine but if you intuitively feel that you want to do more – do! Remember the benefit comes from repeating the routine 3 times a week for 4 weeks.

Start with a mild pressure – this should not make the skin red and irritated.

Notice how you feel when you have completed your dry skin brush. It should feel good!

Then have your shower as normal.

Tweak the Dry Skin Brushing Challenge to Your Needs

Following the basic routine 3 times a week is enough to see results.

You can also choose to dry skin brush every day. I would not do it more than once a day.

You can also tweak the routine to your needs. If dry skin brushing makes your skin very irritated try a softer pressure or material.

There are detailed routines that work more closely with your lymphatic system which a naturopath might advise to support specific health conditions.

 And of course you can leave out certain areas of your body if you need to.

Advanced Skin Brushing

What if you want to focus mainly on your lymphatic system with dry skin brushing?

I like to combine dry skin brushing with a manual lymphatic drainage routine to open up my lymph nodes first ** Simple challenge coming soon.

You might find it interesting to check out this dry skin brushing technique for lymph movement HERE

Drinking enough water and daily movement will work really well with dry skin brushing.

Assessing your Dry Skin Brushing Challenge Results

At the end of the 28-days you complete another assessment.

What differences did you notice? Write them down. 

I just like how good dry skin brushing feels and how soft my skin feels afterwards and I also know I am helping my body detox better.

How about you? Is this self care practice something you will include in your regular self care menu?

Conclusion

Congratulations on completing your 5 Minutes to Feel Good in Your Skin: A 28-Day Dry Brushing Challenge!

I hope you’ve found this practice helpful, energising, and maybe even a little bit joyful.
After all, it’s not just about smoother skin — it’s about remembering the rest of you that’s been hiding under those winter layers.

And remember, one month is only the beginning.
Self-care — like glowing skin — builds with consistency. So keep brushing, keep noticing, and keep showing up for your body in these small, simple ways.

Because feeling good in your skin isn’t a quick fix — it’s a relationship that gets better the more time you spend together.

Well done image in Make Self Care Simple brand colours – completion of 28-day self-care challenge
Well-done! You have completed another step towards making selfcare simple

Want to make these ideas work for your body?

Self-care practices and routines are only the beginning. Learning how your body responds when you follow them helps you decide when to keep going, when to adjust, and when to move on.

Explore the free Make Self-Care Simple resources to begin understanding your own patterns.

→ Start with the Free Resources

Make Self Care Simple shares general self-care education for inspiration only. I’m not providing medical advice — always check what’s right for you with a qualified health professional.

©2025 Make Self Care Simple.

Print or save a summary of this challenge in the handy Challenge ‘Recipe’.
5 Minutes to Feel Good in Your Skin

28-day Dry Skin brushing Challenge

Equipment

  • 1 Towel
  • 1 Dry skin brush Optional
  • 1 Loofah Optional

Notes

How to do the Dry Skin Brushing Challenge

For the challenge you only have to do the basic dry skin brushing routine at least 3 times a week for 4 weeks (28 days).
Assess and score your overall well-being – especially those areas mentioned at the start of this article – before you begin and again when you complete the dry skin brushing challenge. 
You can use a dry towel, dry skin brush or loofah.
Basic Dry Skin Brushing Routine
  1. Start from your feet and brush upwards in long sweeps along the front, back and sides of your legs. Include your buttocks. Medium pressure.
  2. Then go from your hands to your shoulder in the same manner. Don’t forget the back of your neck!
  3. Use a circular (anticlockwise to mimic the colon and aid the process) movement across your abdomen and then for your armpits.
  4. When it comes to your back, I always go upwards in short strokes from the base of my back and downward strokes from my shoulders. Don’t forget your sides under your arms which I do in short strokes.
  5. I go very gently if at all, over my chest area and avoid my face 
 
Assess and score at the end of 28 days.
How did you get on?

Looking for easy ways to move more — even when exercise feels impossible?
These 65 fun Non-Exercise Movement ideas help you sit less, boost energy, and improve well-being through simple daily actions. Perfect if you live with pain, fatigue, or mobility challenges, or just want to break up long sitting hours.
Gentle movement really adds up — and pairs perfectly with the 28-Day Gentle Movement Challenge.

Do you sit for long periods of time?
Wish you could move more, even when exercise isn’t possible?

You’re in the right place! 💛

This post is packed with 65 fun, easy Non-Exercise Movement ideas to help you sit less, feel better, and even burn extra calories — all without doing a formal workout.

If you live with chronic pain, fatigue, mobility limits, or simply spend many hours sitting (think office work, driving, or studying), these small movements can make a big difference to your well-being.

I created this list to go alongside the 28-Day Gentle Movement Challenge — a self-care reset designed around the benefits of gentle, everyday movement (known as NEAT, or Non-Exercise Activity Thermogenesis).


🌿 Why Non-Exercise Movement Matters

You’ve probably noticed that some people just can’t sit still — they’re always fidgeting, stretching, or getting up to do something.
It turns out, all those little movements add up!

One study found up to a 2,000-calorie difference per day between two similar people — simply based on how active their daily movements were.

Now, weight loss isn’t the main goal of non-exercise movement (this is about wellness first), but knowing that small actions can gently support your metabolism is a great bonus — especially if intense workouts aren’t realistic right now.

We all know someone who just can’t sit still for very long, turns out all that fidgeting and jumping up to do something that could wait, makes a big difference to your NEAT movement.


The Goal

The aim here is to:

  • Sit less — try short 2–3 minute activity bursts every 30 minutes.
  • Stay active — even on days when you have to sit for long periods.
  • Move gently and consistently — to boost circulation, energy, and mood.

You’ll find 65 practical, enjoyable ideas below — grouped into five easy sections that match the 28-Day Non-Exercise Movement Challenge.

These ideas are simple enough to start today and might even inspire you to add more structured exercise later on (if and when you feel ready).


💛 Reminder

You can revisit the Gentle Movement Reset: 28-Day Non-Exercise Movement Challenge anytime to plan your own self-care movement routine and track your progress.

Challenge 1 – Ideas to Fidget More this week

65 non-exercise-movement-ideas

Not only will you burn calories, but fidgeting can relieve anxiety, boredom and help with changing bad habits.

Here are some ideas to get you started.

  1. Tapping each finger 5 x
  2. Fist-pump in the air each side 10 x
  3. Tapping toes each foot 10 x (sitting or standing)
  4. Tapping toes both feet 10 x (sitting or standing)
  5. Bouncing heels each foot 10 x
  6. Bouncing heels both feet 10 x
  7. Hand circles – rotate wrists and fingers 10 x both directions
  8. Knitting or crochet
  9. Sketching or colouring
  10. Adult fidget toy – Shashibo
  11. Adult fidget Spinner 

Challenge 2 – Ideas of how to Stand more this week

The benefits of standing more include improved posture, back-pain, circulation and cardiovascular (heart) health, insulin levels (sugar) and boosts focus and concentration

Calories burned between standing-still and sitting were not significant although when you stand for periods of time you are more likely to keep adjusting your posture (fidget). 

Here are some ideas of how you can stand more this week

  1. Stand while on the phone.
  2. Stand at the kitchen counter when using electrical devices.
  3. Stand while ‘crafting’.
  4. Stand in front of the TV or Youtube
  5. Stand doing chores around the home – sprinkle them throughout the day
  6. Stand and take a ‘power pose’ or mountain pose
  7. Stand for 5-minute meditate or listen to short guided visualisation
  8. Stand and perform breathing exercises 
  9. Standing desk – if you work from home this is a great investment.

Challenge 3 – Active sitting Ideas 

Active or dynamic sitting is where you include frequent micro movements while sitting for long periods of time. 

The benefits include improved posture (back, neck, shoulder pain), core-strength and circulation (cardiovascular/heart health).

Seated workouts are a very popular solution for those with restricted mobility or who need to sit for long periods for work. Full Seated-Workouts are classed as formal exercise (which you can also include) YouTube examples Here, here & here.

You can use these workouts for ideas to create micro 2-minute active sitting movements.

Active sitting (fidgeting while seated) burns extra calories (energy expenditure) and if you can move your legs while seated this increases by 20-30%

65-non-exercise-movement-Ideas

Here are 20 ideas to include for micro-active-sitting 

  1. Seated arm rows
  2. Overhead arm raises
  3. Knee lifts
  4. Knee extensions
  5. Seated chair march
  6. Arm swings
  7. Arm reaches
  8. Toe taps
  9. Seated cat cow stretch
  10. Chair forward bend
  11. Chair spinal twist
  12. Neck stretches
  13. Seated Eagle arms Seated bent over rows
  14. Seated shoulder press
  15. Seated bicep curls
  16. Seated triceps extensions 
  17. Rocking Foot stool such as HERE
  18. Under-desk-pedal-bike – Try This.
  19. Office ball chair example Here
  20. Saddle chair

“It’s 100% free—no strings attached.”

Challenge 4 – Ideas to Include More Calf Raises

Calf raises not only burn calories but also strengthen calf muscles which improve lower body function, improve stability and reduce risk to sprains and strains.

Calf-raises also support the ankle and knees.

These can be done seated or standing, on a step and with dumb-bells. 

Remember the Non-Exercise goal is micro 2-minute sessions throughout the day.

Read or watch BELOW how to perform calf raises

How to do simple calf raises

  • Sit or stand with both feet on a flat surface with your toes pointed straight ahead.
  • Lift one or both heels off the floor to flex your calf muscle.
  • Pause for moment, then slowly return to the floor. That’s one rep.

Here are Calf-Raise Variations and Ideas

  1. Lifting both heels together
  2. Lifting one calf at a time (alternate)
  3. Turn feet inward slightly
  4. Turn feet outward slightly 
  5. Add light weights while you perform calf raises
  6. Use a low step to create more of a stretch.

Challenge 5 – Increase daily walking, bending, stretching, twisting.

These are the well-known examples of NEAT movement. The little every day activities and tweaks you can make to gently increase your movement without formal exercise to burn more calories and boost your well-being.

65-NON-EXERCISE-MOVEMENT-IDEAS

How many of the following ideas can you include today?

  1. Pace when you take a phone call.
  2. Park further away so you walk more steps.
  3. Identify where you could stand more in your normal day.
  4.  Housework counts as NEAT – can you increase your daily cleaning activity? How many 5-minute chores can you complete in a day?
  5.  Walk with friends and family
  6. Walk the dog
  7. Clean the car
  8. Gardening counts as NEAT – how many 5-minute jobs can you complete today?
  9. Cooking and clearing up counts as NEAT
  10. Walk whenever you have the choice
  11. Having a shower counts as NEAT
  12. Dancing 
  13. Spending time with kids
  14. Getting up and making a drink
  15.  Warm-up movements from a workout
  16. Squats
  17. Arm swings
  18. Stretch while watching tv
  19. Take the stairs whenever you can

Summary

Whew well done you made it to the end! So that wraps up my 65 Fun Non-Exercise Movements Ideas to inspire you to take the Challenge HERE

Well done image in Make Self Care Simple brand colours – completion of 28-day self-care challenge
Well-done! You have completed another step towards making selfcare simple

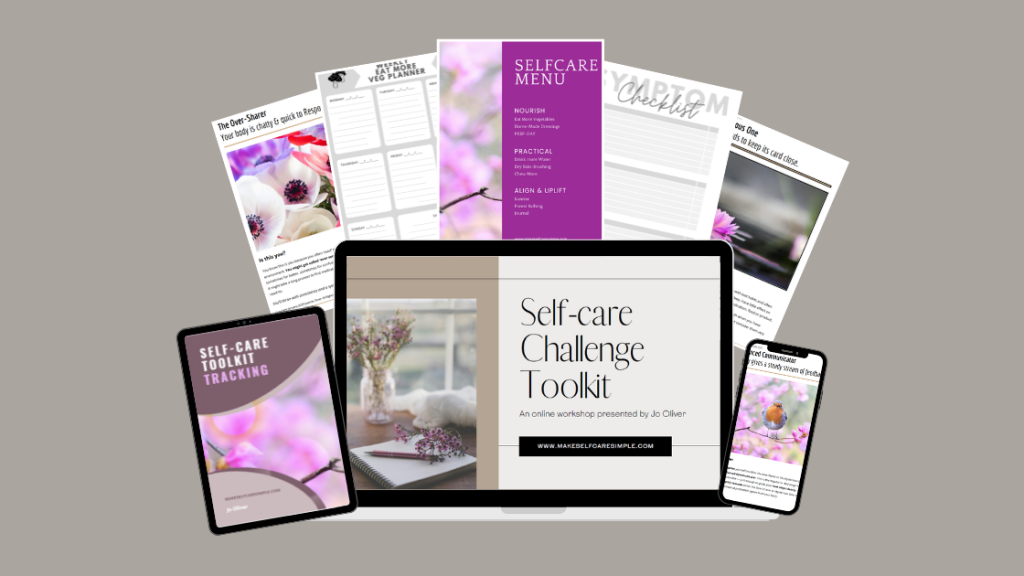
You’ve already started thinking about how to care for your body’s everyday needs — why not make it easier to stay consistent? The toolkit shows you exactly where to start

Free Self-Care Start-Up Toolkit

Turn inspiration into action — with a simple system that helps self-care finally work with your body, not against it.

If you’ve been reading along and thinking, “I’d love to try this myself one day…” — you don’t have to wait, or wonder where to start.

The Free Self-Care Start-Up Toolkit gives you the gentle structure to make your first challenge easy, personal, and effective.
It’s the same step-by-step approach I use when following the challenges alongside you — so you’ll feel supported every step of the way.

Inside, you’ll find:
🌿 A gentle Before Assessment to pinpoint what your body truly needs — so you can stop guessing and start seeing real results
🌿 Step-by-step guidance (plus short video walkthroughs) to choose the right self-care challenge for your needs — and actually complete it.
🌿 Printable planners, reflections, and trackers to help you stay consistent
🌿 Access to our private community (coming soon!) — for gentle accountability and encouragement

You’ll also receive:
💌 Weekly self-care reminders, new challenges, and encouragement in the Make Self-Care Simple newsletter
🪴 Access to our free private community — where women share progress, celebrate wins, and remind each other we’re not alone

👉 Send Me My Free Toolkit

(Part of the Practical Self-Care Pathway — build habits that support your body’s natural balance.)

“Instant access—start your challenge today.”

A Personal Note

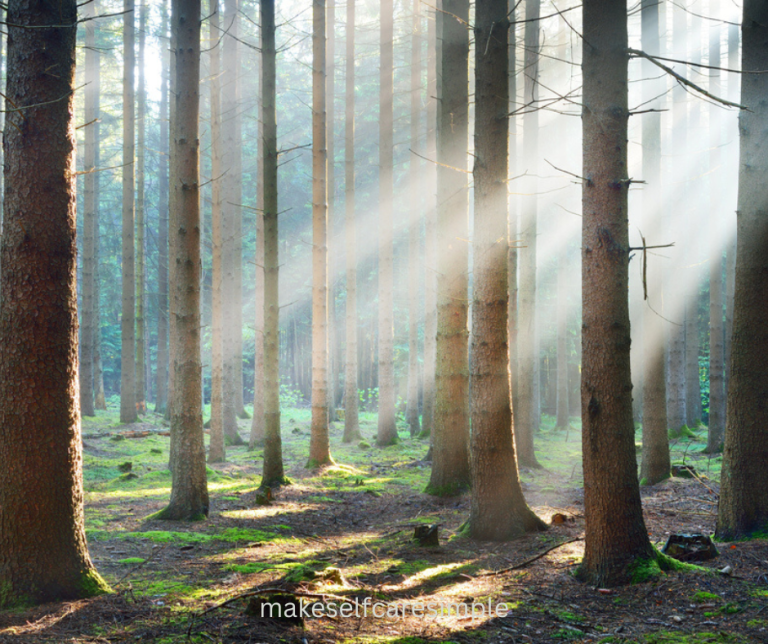
As far back as I can remember, the moment I stepped inside a wood, forest, or even a small spinney, I immediately noticed a shift — both in my surroundings and within myself. The tall, cathedral-like acoustics, the soft feel underfoot, and that earthy, grounding scent all seem to whisper, slow down, you’re safe here.

My breathing naturally becomes deeper, and for me, there’s always a feeling of profound inner peace. (Proper footwear helps too — this is the UK, after all, and muddy serenity is still serenity.)

This challenge is about mindfully harnessing that experience — learning how to use your local wood or forest as a natural way to recharge, refresh, and reset.

There are so many different self-care practices that help with stress, and I’ve tried many of them. But forest bathing remains a favourite because it’s simple, deeply restorative, and reconnects you with something far bigger than stress. And if you can’t travel or have mobility challenges, don’t worry — I’ll share ways to create your own garden bathing experience too.

Join me in the woods for a few moments!

What Is Forest Bathing?

Forest Bathing, or Shinrin-yoku, began in Japan in the 1980s as a response to rising stress, anxiety, and fatigue among workers. It’s a mindful sensory practice that helps you slow down and reconnect with nature. You walk or sit quietly among trees, noticing the sounds, sights, scents, and textures that surround you.

In essence, it’s not about doing, but about being — allowing the forest to hold you while you let go of daily noise and demands.

The Science Behind Forest Bathing

Trees release natural compounds called phytoncides — aromatic chemicals that protect them from insects and disease. When we breathe them in, studies show they help lower cortisol levels, reduce inflammation, and support the immune system.

Forest bathing also activates your parasympathetic nervous system — the part that signals rest, repair, and recovery. Just 30 minutes among trees can calm the mind and body, even when life feels chaotic.

When to Try Forest Bathing

You might choose forest bathing when you feel drained, overwhelmed, restless, anxious, or low in mood. It’s equally beautiful when life feels steady — as a way to maintain your inner balance and refresh your energy.

Whether it’s the crisp quiet of winter, the soft greens of spring, the shade of summer, or the glow of autumn, each season brings its own kind of healing.

Prepare for Your Forest Bathing Experience

Choose Your Location.

You don’t need a vast forest — a local wood, park, or even a group of trees can work beautifully.

Helpful Resources:

Woodland Trust – UK

National Trust – UK

Forest bathing in Europe

Find a Forest – USA

Plan Ahead: Check the weather and dress for comfort. Let someone know where you’re going if you’ll be alone. Bring water, a small snack, and something dry to sit on. Switch your phone to silent once you arrive — this is your time to disconnect.

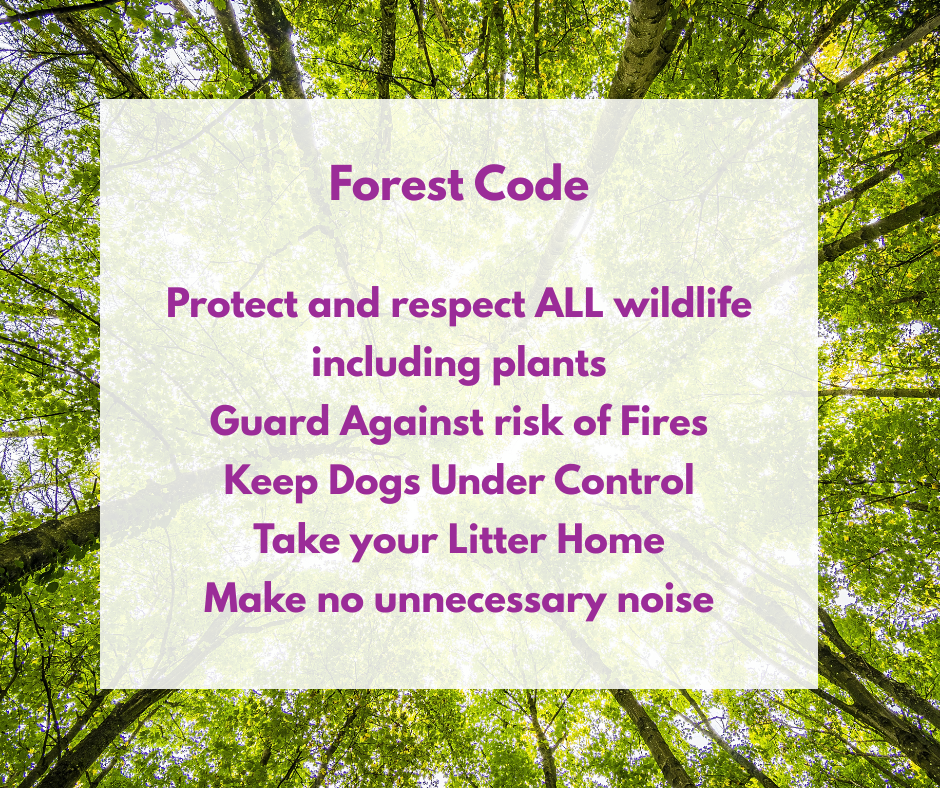
The Forest Code

Here is a reminder of The Forest Code

Forest code

When you Arrive

Pause for a moment at the entrance. Notice the shift in light, sound, and energy as you step into the trees. If you’re with a friend, agree on a time to meet again, then give each other space to explore quietly.

You might begin with a simple intention, such as: Today I give myself permission to rest or I open myself to peace and renewal.

Set an intention forest bathing plan

Your Forest Bathing Plan

Forest bathing usually includes two gentle parts: Slow Walking and a Sit Spot.

Slow Walking

Move slowly — far more slowly than usual. Let yourself pause often and use your senses as guides.

  • Sight: Notice colours, patterns, and movement.
  • Sound: Listen for birdsong, rustling leaves, wind through branches.
  • Smell: Breathe in the earthy scent of soil, bark, or moss.
  • Touch: Feel textures — the ground under your feet, the bark of a tree, the air on your face.

Mindful Walking: Bring your awareness into your body. Notice how your shoulders, arms, and legs move. When your mind wanders, gently bring it back to what you feel underfoot or the rhythm of your steps.

Tree Connection: You can gently lean against or embrace a tree and simply breathe. It’s a lovely way to connect, release tension, and absorb the grounded calm that trees naturally offer.

Find your Sit Spot

Find a quiet place to sit for 10–30 minutes — a fallen log, a bench, or a picnic mat. Observe everything around you: light, texture, patterns, movement, and sound.

You might choose to journal or sketch what you notice, meditate or pray, enjoy a mindful snack, or simply sit and breathe. There’s no right way to do this — your only goal is to be fully present.

Gratitude Walk Back

As you slowly walk back, take a few moments to reflect. How do you feel now? What did you notice or appreciate? Which tree, plant, or sound stood out to you? End with a small inner thank you — for the forest, for yourself, and for the moment you took to rest.

Forest bathing plan makeselfcaresimple

Garden Bathing (Home Practice)

If you can’t get to a forest, you can still enjoy a mini version of this practice at home. Sit near a tree in your garden or balcony, or near a window with a view of greenery. You can even connect with a houseplant or recently planted tree — research shows that proximity to plants still helps calm the nervous system.

Use the same approach: slow down, breathe, notice, and appreciate.

Final Thoughts

Forest bathing is a beautiful, accessible way to reset your mind and energy — no special skills or travel needed. Try it once a week or even once a month, and notice how you feel before and after. Keep a small journal or voice note to record your reflections.

For me, forest bathing is both restorative and preventative. It helps me reconnect with peace — whether I’m walking under summer leaves or through the quiet, rain-soaked woods of winter. Will you try forest bathing? I’d love to hear what you discover.

Remember, muddy boots and messy hair still count — what matters is that you showed up.

Will you try forest bathing? I’d love to hear what you discover.

Well done image in Make Self Care Simple brand colours – completion of 28-day self-care challenge
Well-done! You have completed another step towards making selfcare simple

You Felt a Small Shift Today… Let’s Help You Keep It

That small shift — whether it was a moment of calm, a little more energy, a sense of relief, or simply feeling more like yourself —
that is where meaningful change begins.

But on low-sparkle days, it’s easy to lose that feeling.
Motivation dips first.
Overwhelm creeps in.
And even the gentlest intentions fade.

Your body doesn’t need pressure or perfection.
It needs one easy mini practice you can return to — especially on days that feel heavy, uncertain, or tense.

The Free Self-Care Start-Up Toolkit helps you turn “I want to feel better” into one easy, real-life step — by helping you choose and begin a challenge you can actually use when your mood dips.
Most people like to complete it over a relaxed weekend, and it includes short step-by-step videos and simple printables to help you begin gently.


Download the Free Self-Care Start-Up Toolkit

A calm, supportive starting point for your first Align & Uplift practice.

Inside, you’ll gently discover how to:
🌿 understand where you might need emotional or energetic support
🌿 choose one tiny Align & Uplift practice that fits your real life
🌿 begin without pressure or relying on willpower
🌿 notice subtle shifts that help you feel lighter and more grounded

You’ll also receive:
✉️ weekly reminders to support your consistency
💬 access to our private community (coming soon)


👉 Send Me My Free Toolkit

(Part of the Align & Uplift Pathway — reconnect with calm, joy, and emotional balance)

Real self-care is about listening to yourself.
Because being healthy isn’t always easy — but it can be made simple.

Free Self-Care Challenge Toolkit

Make Self Care Simple shares general self-care education for inspiration only. I’m not providing medical advice — always check what’s right for you with a qualified health professional.

©2025 Make Self Care Simple.

Download or print your Reminder Here

How to Plan your First Forest Bathing Experience – Ready to Recharge & Feel Refreshed.

Print or Save as PDF

Notes

Printable Summary – Forest Bathing “Recipe”

Goal: Recharge, relax, and refresh your energy through mindful time in nature.
Duration: 30–60 minutes (or longer if you wish)
You’ll need: Comfortable shoes, water, mat or chair, journal, weather-appropriate clothing
  1. Choose a forest, wood, or tree-filled area
  2. Set a simple intention
  3. Walk slowly and use your senses
  4. Find a sit spot to pause and reflect
  5. End with gratitude and appreciation
 
Feeling inspired? Join the Make Self-Care Simple newsletter for gentle self-care ideas, new challenges, and community support.

You’d think drinking water would be the easiest healthy habit in the world.
And yet… here we are — another day, another half-full glass on the counter.

If plain water feels boring, forgettable, or just impossible to keep up with, you’re in good company. I’ve lost count of how many clients (and days!) I’ve had the same struggle.

That’s why this challenge keeps it as simple as possible — no huge bottles, no timers, no guilt trips.
Just small, steady sips that remind your body what it feels like to be properly hydrated again.

After all, self-care isn’t always about doing more — sometimes it’s just about remembering to drink what’s right in front of you.

Because apparently, coffee doesn’t count (I checked).

Jump to Recipe

The Intention

To gently reintroduce your body to regular hydration and create a rhythm that feels natural.
Like all Make Self-Care Simple challenges, you’re encouraged to adapt it to fit your own energy, lifestyle, and body’s needs.


Try this Challenge If:

  • You suspect you don’t drink enough water
  • You find water boring or forget to drink regularly
  • You struggle with fatigue, headaches, or sluggish digestion
  • You want a simple, low-effort self-care habit that makes a big difference

(Tip: I find this challenge especially helpful in the cooler months when it’s easy to forget to drink.)


Pin for later ?

What Is the Drink More Water Challenge?

Over the next 28 days, you’ll track and celebrate the days you meet your personal water goal.
You’ll start small — just five mini “sips” a day — and see what changes you notice in your energy, skin, and focus.

By the end of the challenge, you’ll have clear feedback on how hydration affects your wellbeing — and you’ll decide if you want to make it part of your regular routine.


Why Water Matters

Water supports nearly every function in your body — from energy and temperature regulation to digestion and brain function.

Even mild dehydration can affect your mood, concentration, and metabolism. Over time, it can also put stress on your kidneys and joints.

So, a little consistency really does go a long way.


How Much Water Do You Need?

There’s no perfect number. Everyone’s needs are different and depend on:

  • Temperature and weather
  • Activity level and sweating
  • Age, gender, health, and medications

Instead of chasing a fixed target, this challenge focuses on habit and awareness.
You’ll simply notice how your body feels as you drink more regularly.


Check-In Before You Begin

Spend one day observing how much you currently drink. Include everything — tea, coffee, smoothies, juice, and water.
Then ask:

  • How much of this is pure water?
  • How do I feel (energy, mood, focus, skin, digestion)?

You’ll use these notes to compare your “before” and “after” once the challenge ends.


The Simple 28-Day Drink More Water Challenge

For the next 28 days, drink at least 100 ml (about 3 fluid ounces) of plain water at these times:

1️⃣ Upon waking
2️⃣ Before breakfast
3️⃣ Before lunch
4️⃣ Before dinner
5️⃣ Before bed

That’s just five quick moments a day — about two big gulps each time.
Over 28 days, that adds up to around 14 litres (24½ pints) of pure water.

This is in addition to your normal beverages.


Why This Works

  • Small = achievable. 100 ml at a time feels easy, which helps you stay consistent.
  • Timing = benefit. Drinking before meals supports digestion and helps prevent overeating. Drinking on waking and before bed supports detox and hydration overnight.
  • Habit stacking = success. Pairing water with things you already do (like meals or brushing your teeth) helps make the habit automatic

Can I Drink Warm or Hot Water?

Yes! It all counts — cold, warm, or hot — as long as it’s plain water (no flavourings or sugar).
Some people find warm water easier to drink in cooler weather. Experiment and notice what feels best.


Want to Take It Further?

If this feels easy, you can gently increase:

  • Drink 150–200 ml each time instead of 100 ml
  • Or add another 100 ml after every bathroom break

You’ll get even more benefit without feeling overwhelmed.


Tracking Your Progress

Inside your toolkit

Tracking makes this more fun — and motivating!

Use your Drink More Water Tracker from the Free Self-Care Startup Kit or simply tick off each day in your journal.
After 28 days, compare how you feel.

Common improvements:

  • More steady energy
  • Clearer skin
  • Better digestion and regularity
  • Fewer headaches
  • Improved focus and less fatigue

If you don’t notice much change, that’s okay — it might mean your hydration was already good, or your body needs more time. Either way, awareness is progress.


Reflection & Integration

After 28 days:

  • Review your “before” and “after” notes
  • Notice small wins — even subtle ones
  • Decide if you’d like to continue or increase your daily intake

Remember, consistent small habits make the biggest difference


Final Thoughts — Stay Hydrated (Without the Pressure)

Congratulations on completing your 28-Day Drink More Water Challenge!
You’ve strengthened one of the simplest — and most powerful — self-care habits there is.

If you managed to drink more water than you spilled, forgot, or replaced with tea… that’s a win.
Because every small, consistent sip adds up — to better energy, clearer skin, and a lighter mood.

Keep listening to your body, keep your water nearby, and keep it simple.
And if you ever fall off the hydration wagon, don’t worry — your next sip is always a fresh start.

Why not invite a friend to join you next month? Hydration (like laughter) really is better when shared.

Because apparently, coffee still doesn’t count — but you’re doing brilliantly anyway.

Well done image in Make Self Care Simple brand colours – completion of 28-day self-care challenge
Well-done! You have completed another step towards making selfcare simple

Take the First Step…

We’ve all done it — promised ourselves we’d start that new healthy habit “tomorrow,” and felt oddly proud of the plan… until tomorrow never comes.

The truth is, self-care doesn’t need a perfect day — just a small, curious step today.

Your body learns from action, not intention. The Self-Care Start-Up Toolkit helps you turn what you’ve learned into action — so your self-care finally becomes real, simple, and yours.

Free Self-Care Start-Up Toolkit

Turn inspiration into lasting results — with a simple system that helps self-care finally work with your body, not against it.

If you’ve been reading along and thinking, “I’d love to try this myself one day…” — you don’t have to wait, or wonder where to start.

The Free Self-Care Start-Up Toolkit gives you the gentle structure to make your first challenge easy, personal, and effective.
It’s the same step-by-step approach I use when following the challenges alongside you — so you’ll feel supported every step of the way.

Inside, you’ll find:
🌿 A gentle Before Assessment to pinpoint what your body truly needs — so you can stop guessing and start seeing real results
🌿 Step-by-step guidance (plus short video walkthroughs) to choose the right self-care challenge for your needs — and actually complete it.
🌿 Printable planners, reflections, and trackers to help you stay consistent
🌿 Access to our private community (coming soon!) — for gentle accountability and encouragement

You’ll also receive:
💌 Weekly self-care reminders, new challenges, and encouragement in the Make Self-Care Simple newsletter
🪴 Access to our free private community — where women share progress, celebrate wins, and remind each other we’re not alone

👉 Get Your Free Toolkit & Join the Community

(Part of the Practical Self-Care Pathway — build habits that support your body’s natural balance.)

discover your selfcare blueprint

Make Self Care Simple shares general self-care education for inspiration only. I’m not providing medical advice — always check what’s right for you with a qualified health professional.

©2025 Make Self Care Simple.

Download your free handy challenge reminder!

28-Day Drink More Water Challenge

Prep Time1 day
Total Time28 days

Notes

28-day Drink More Water Challenge

Goal: Build a simple daily hydration habit
Duration: 28 days
You’ll Need: Water, glass or bottle, tracker or journal
Steps:
  1. Track your current intake for 1 day
  2. Drink 100 ml at 5 key times (morning, before meals, before bed)
  3. Log your progress daily
  4. Compare your before/after notes at the end
  5. Optional: Increase amount or frequency after week 2