When healthy changes work for some people… but not for you
If you’re anything like me, midlife is when unwanted changes — both physical and health — seem to increasingly take over your body, mood and even your life.
Everywhere you look there are solutions, experts and advice offering hope that there is an answer.
At first, it’s a relief to realise there are things that have worked for other people.
Until you follow the instructions… faithfully.
And you don’t see the same results.
With so many success stories — both online and in real life — comparison creeps in and you start second-guessing yourself:
• Am I too impatient? • Do I need to add more changes? • Should I quit?
And that’s when the thought appears:
“Why does this seem to work for everyone else but not for me?”
Why healthy changes don’t work the same for everyone
Healthy changes only produce results when they match what your body actually needs.
But the signals that show whether something is helping don’t look the same for everyone.
Bodies tend to show feedback in three different patterns.
Each pattern responds to change in its own way — including how and when results show up in your body.
The good news is that all three feedback patterns can act as guidance systems. And it’s never too late to discover yours.
Once you recognise your pattern, those signals become much easier to interpret — helping you decide whether a healthy change is worth continuing.
The questions below help you recognise which feedback pattern your body tends to show. It takes less than a minute.
Ready?
Choose the option that feels most familiar.
Don’t overthink it.
Your first instinct is usually right.
THE QUESTIONS
Instructions: Choose the option that feels MOST like your usual experience.
Q1 — When you try a new healthy habit
(diet change, exercise routine, supplement)
A. It can take quite a while before I notice any clear change B. My body usually reacts quite quickly C. I usually notice gradual changes over time
Q2 — When something doesn’t suit your body
(food, product, medication)
A. It may take a while before I realise something isn’t right B. My body lets me know fairly quickly C. I usually notice within a reasonable amount of time
Q3 — How would you describe your body’s general response?
A. Changes tend to be subtle and slow to appear B. My body tends to react strongly or quickly C. My body responds steadily — not too fast or slow
Q4 — When a healthy change is helping
A. The improvements are small and gradual B. The improvements are quite noticeable early on C. The improvements appear gradually but clearly
Scoring (very simple)
Mostly A → Subtle Responder
Mostly B → Sensitive Responder
Mostly C → Steady Responder
“You may sit between two styles — this is very common.”
Get your Full Feedback Style Guide
You may already recognise your feedback style from the questions.
If so, that is the first step — and if you sit between two patterns, that’s completely normal.
Nothing about your body is “wrong.” It knows what it needs but often signals feedback in ways that are easy to miss until you know what to look for.
In the guide, I’ll show you how to use your body’s feedback pattern to recognise when a healthy practice is right for you — and what small adjustments can help your body respond more easily.
Most importantly, you’ll learn how to decide whether to continue, adjust, or move on when something seems to work for others but not for you.
Each month I share a real-life self-care reflection — not as a perfect example, but as a way of showing how the body responds to the life we’re actually living.
If you’ve ever felt like your body doesn’t follow the plan, these monthly updates will help you start noticing the patterns that are easy to miss in real time.
When Progress Is Quiet — But Real
February self-care could have been hastily written off as a ‘nothing changed’ month, which so easily leads to giving up, doubt or moving on to the next shiny idea.
Instead, I listened a little more closely to my body, and a different pattern emerged
At first glance, many of my daily tracking patterns looked surprisingly similar to last month.
But when I placed these three pieces of information side by side — weekly life snapshot, symptom shifts, and daily self-care tracking — a much more encouraging picture quietly emerged..
And it reminded me again of something I keep seeing:
The body responds intelligently to the life we are living.
Cycle 2 — Big Picture “Weather”
I’ve become increasingly aware that our wellbeing is influenced not only by our personal circumstances, but also by the wider emotional and environmental climate we’re living in.
February carried a subtle background hum of unrest for me. Ongoing world news — including the continued fallout from the Epstein files — conversations about the future of work and AI, and a general sense of uncertainty all seemed to add an underlying feeling of building tension that my body subtly braced for.
Nothing dramatic day to day — but very clear once I zoomed out.
As someone who followed astrology closely for many years, I also noticed the rare Neptune–Saturn conjunction at 0° Aries in the background of this period. Not something I base self-care decisions on — but fascinating to observe alongside the collective mood.
Seasonally, this cycle sat right on the edge between late winter and the earliest hints of spring. The lengthening daylight always feels uplifting, although the persistent grey, cold, wet days felt never-ending.
On the brighter days — those crisp blue winter skies — I could feel my energy and mood lift almost immediately.
Which, again, is useful feedback.
The Life Behind This Month
This cycle began under pressure.
There was an unsettling late-night incident that shook both myself and my daughter, followed by growing stress in my day job. I knew this meant that my overly sensitive body would be even more fragile over the coming weeks so tried to carefully monitor where my energy went and any early signs of tension.
Life looked quiet and no drama to report on the outside
But events in my daily life combined with the general climate created a high load month.
And those are often the months that reveal the most.
One thing became very clear:
I had to spend most of my available energy on recovery and minimising additional stress.
Bad timing — but useful information.
What the Numbers Showed
My daily self-care tracker for February
When I reviewed my symptom assessments, something interesting appeared.
Despite experiencing at least as much stress — and possibly more — my overall symptom scores had improved across all body systems.
Not dramatically.
But noticeably.
This is exactly the kind of quiet shift that is easy to miss if you only look at how you feel day to day.
Because day to day, February still felt demanding.
But the body was, quietly, coping better.
Where Self-Care Was Supporting Me
This month confirmed something important for me:
Micro nervous system support was making a difference.
I also returned to several previous routines that, in hindsight, had been quietly supporting my system all along.
Nothing extreme.
Just small, consistent moments of support.
And my body responded well to it.
In fact, one of the biggest shifts this month was internal:
I rested more.
I stopped pushing.
And instead began allowing both my self-care and my work to move at a slower, more sustainable pace.
That alone reduced a surprising amount of ‘inner’ pressure.
The Subtle Wins I Could Easily Have Missed
If I had only looked at surface progress, I might have missed the real story of February.
Because alongside the stress, I noticed something I haven’t felt for quite some time:
Small glimmers of genuine anticipation for the new life I’m slowly building
Moments of vitality.
These were brief moments that bubbled up from inside me — definitely new and very welcome.
For me, these are early signals that my body now has the early reserves in place to start rebuilding.
And those signals matter.
What Fatigue Taught Me This Month
One very practical pattern also became clearer.
Fatigue tended to hit later in the day — and that directly affected my ability to follow through with evening self-care.
I also noticed something socially important:
After a full day of phone-based work, long catch-up calls with friends — although emotionally supportive — sometimes drained my remaining energy.
Interestingly, on genuinely better days, I naturally wanted more connection.
Which again told me:
My body is very clear about what it has capacity for — when I pay attention.
What Supported My Body Most
There were a few moments this month that stood out very clearly.
On several evenings I turned to my very simple sound bath practice and could feel — almost immediately — how much my body softened.
That was useful confirmation.
Alongside this, a few practical supports continue to help:
reducing sugar (histamine trigger)
smaller evening meals
mini nervous system practices
and increasingly… flexible pacing with my energy
Nothing complicated.
But each step I made was increasingly in response to listening first.
How This Is Shaping Cycle 3 (March 2026)
Looking ahead, I already know the next cycle contains:
longer work hours
increased responsibility
and some added home pressures
So rather than adding more, I’m adjusting early.
My focus for the coming cycle is:
continuing regular sound baths
exploring gentle wildlife gardening to support my nervous system
being more intentional about after-work social energy
maintaining the nutrition patterns that clearly help
In other words:
matching support to reality — not to ideal plans.
The Quiet Truth February Reinforced
This month didn’t deliver dramatic change.
But it did reinforce something deeply encouraging.
Even under continued stress…
Even in a high-load season…
The body can still stabilise and begin to improve when it is finally heard.
And sometimes the most meaningful progress is easy to overlook because it arrives quietly.
A Reminder
If you take anything from this month’s reflection, let it be this:
You don’t always need to do more.
Sometimes the most supportive shift is simply learning to read what your body is already telling you — and adjusting accordingly.
That is the work I am continuing to practise myself.
A short guided pause for women who always show up — yet whose bodies never fully rest.
Many women don’t feel anxious or stressed — they live with a quiet, ongoing tension, like they’re carrying a lot.
Responsibilities, worries, decisions, being the one others rely on — all held quietly inside.
Life feels manageable. Emotions feel steady. And from the outside, everything looks fine.
Because you are coping. You always cope. Often you’re even thriving.
But inside, the body tells a different story.
A body that slows down, but never fully switches off. A body that stays quietly alert — just in case.
Sometimes it shows up as tension you barely notice, difficulty fully relaxing, or recurring physical symptoms that don’t match how strong you cope emotionally.
If this feels familiar, you’re not alone.
Below you’ll find short guided pauses you can use whenever you need — simple moments where the part of you that’s been carrying so much doesn’t have to
This pause is for you if…
You don’t feel overwhelmed or burnt out — you just never fully switch off.
You show up. You manage. You keep going.
Life looks fine on the outside — but your body stays quietly “on,” even when nothing is wrong.
Is this you?
You might recognise yourself in one of these:
🌀 The Internal Processor
You think clearly and function well
You feel emotions, but mostly in your body
You don’t notice tension until it softens
🫶 The Quiet Carrier
Others rely on you
You carry responsibility without complaining
You rarely fully relax
You may also notice:
difficulty switching off, even when tired
feeling alert inside without knowing why
tension you only notice after it releases
sighing without realising
recurring physical symptoms with no obvious emotional cause
These aren’t problems to fix — they’re signs of a nervous system that’s been quietly carrying for a long time.
Why this pause feels different
Reading a book or watching a favourite show can help the mind relax.
But for many women, the body stays quietly alert underneath.
This pause isn’t about distraction or escape. It gently supports the part of you that never quite switches off — so the body, not just the mind, gets a moment to soften.
Not better than other ways of resting. Just aimed at a different layer.
Align & Uplift Challenges
Where this fits
The Nervous System Pause is part of Align & Uplift — one of the four self-care pathways at Make Self-Care Simple.
Align & Uplift focuses on short, simple practices you can use as and when you need them. Some lift your mood or energy. This one supports the body when emotions already feel steady.
You don’t need to follow a schedule. Try a pause once. Notice what shifts. Return whenever you feel drawn.
🌙 Coming soon
The first Nervous System Pause meditations are currently being recorded.
They’ll be short (around 3–4 minutes), easy to use, and designed to fit into real life — even on busy days.
You’ll be able to try the first guided pause here very soon.
Stay connected
If you’d like to be the first to hear when new challenges are added — including future Nervous System Pauses — you’re welcome to join the Make Self-Care Simple newsletter.
You’ll also receive the free Self-Care Toolkit to help you explore the different pathways and find what supports you best.
Fruit-sweetened, refined sugar free, and fully adaptable to your body.
Discover low/no-sugar baking made with fruit-sweetened and refined-sugar-free ingredients — from cakes and muffins to brownies, cookies, pies and more. These bakes are flexible, adaptable to your needs, and offer sweet enjoyment without the crash. A gentle, joyful way to explore dessert that truly nourishes your body..
Welcome to This Month’s Nourish Inspiration
This month, we’re exploring one of my favourite forms of gentle nourishment:
Baking that feels good for both body and mood.
For years, I thought cake had to be “earned” or “justified.” I either restricted it or overdid it — never quite finding balance.
But as I simplified my approach to self-care, I realised something important:
✨ Joy is nourishment. ✨ Creativity is nourishment. ✨ And sweet flavour can be too — when it supports rather than drains us.
Low/no-sugar baking isn’t about missing out. It’s about enjoying sweetness in a way that feels better for your body.
A Few Low/No-Sugar Recipes to get you Started
Below are some beautiful bakes to explore this month — soft, nourishing and full of flavour without refined sugar.
Superfood Chocolate Quinoa Bars
From simplyquinoa.com. Crispy, nourishing + gently sweetened with dates — a treat that feels indulgent without refined sugar.
From kivacooks.com. Protein-rich, fudgy + flourless — sweetened with erythritol or coconut sugar for a balanced bite.
Healthy Oatmeal Apple Cake: A Delicious Guilt-Free Treat!
From cookinglayer.com. Moist, spiced + naturally sweet from apples and honey — simple ingredients, beautiful flavour.
A few more naturally sweet bakes coming up…
Why Explore Low/No-Sugar Bakes?
We often think of sugar as something to avoid — but sweetness itself isn’t the problem.
Sweet is one of the five essential tastes, alongside salty, sour, bitter and pungent (spicy). Traditionally, it’s associated with:
• grounding and calm • nourishment and harmony • soothing digestion • emotional balance
The issue is not sweetness — it’s refined, concentrated sugar and artificial sweeteners that overwhelm the body.
These recipes explore sweetness in forms that tend to feel more balanced:
fruits (banana, apple, dates, dried fruit)
honey, maple syrup or coconut sugar
monk fruit, stevia and gentle alternatives
Different bodies respond differently — this month is about discovering which feel best for you.
Banana Oatmeal Muffins (No Flour, No Sugar)
From us.wilingga.com. Soft, wholesome + easy to batch bake — sweetened only with banana and applesauce.
Chocolate Quinoa Cake (Gluten Free & Sugar Free)
From sunkissedkitchen.com. Light, fluffy + surprisingly like traditional cake — gently sweetened with dates.
Keto Carrot Cake
From chocolatecoveredkatie.com. This easy sugar free keto carrot cake recipe is soft, moist, and completely delicious – sweetened with Monkfruit.
Keep scrolling for more low no sugar treats…
A Note on Transitioning Gently
If your body is used to refined sugar, switching suddenly to low/no-sugar baking can feel uncomfortable at first. Some people even experience withdrawal-like symptoms, such as cravings, headaches, irritability or fatigue.
This is not a sign that you’re doing something wrong — it’s simply your body recalibrating.
My Nourish approach is never “all-or-nothing.”
You might ease into this month by:
• replacing sugar gradually rather than overnight • starting with recipes sweetened by fruit • pairing bakes with protein or fibre to stabilise energy • choosing sweeteners your body digests comfortably • focusing on pleasure, not perfection The aim isn’t withdrawal or restriction — It’s a gentle shift into sweetness that truly supports you
Crustless Vegan Gluten-Free Pumpkin Pie
From powerhungry.com. Silky, spiced + allergy-friendly — crust-free simplicity sweetened with maple, agave or honey.
Sugar-free-sponge-cake
From thesugarfreediva.com. Light, airy + classic — sugar-free sweeteners like monk fruit or erythritol keep it gentle.
Sugar Free Double Chocolate Cake
From mysugarfreekitchen.com. Decadent, moist + rich in chocolate flavour — naturally sweetened with monk fruit.
More recipe treats below…..
No One Approach Is Right for Everyone
Some people feel wonderful using fruit and natural sweeteners as a softer alternative. Others find that even honey, banana or dates affect them almost like sugar does.
Both experiences are valid.
What supports one body might overstimulate another — and Nourish honours that. Instead of avoiding or forcing sweetness, we meet it with curiosity and awareness.
Notice how your body feels. Adjust slowly. Choose what supports you best in this moment.
There is no judgement here — only exploration.
Sugar Free Pound Cake
From atasteofmadness.com. Tender, buttery-textured + subtly sweet with stevia — lovely plain or topped with fruit.
Cinnamon Sweet Potato Breakfast Cookies
From recipessmile.com. Soft, chewy + gently sweetened with maple or honey — a nourishing cookie that feels like comfort food.
Chocolate Quinoa Bark
From andianne.com Sweet, salty, and crunchy bark – sweetened with maple syrup.
How This Theme Fits the Monthly Nourish Challenge
The Nourish Challenge is simple and flexible:
Try one new recipe each week Adapt it to suit your needs Notice how your body responds
This month, adaptation might look like:
• swapping flour for almond, oat or quinoa • reducing sweetener a little at a time • experimenting with fruit-sweetened bakes • leaning into warming spices like cinnamon and ginger • enjoying your sweet treat mindfully — without guilt
No pressure. No rules. Just curiosity, creativity and kindness.
Personalise This Theme
• swap fruit or sweeteners gently • explore alternative flours • add nuts, citrus, cacao nibs, spices • pause + taste with awareness
Let sweetness be slow, mindful, and satisfying.
Ready to Begin?
Choose one bake to try this week — soft, spiced, chocolatey, fruity or gently sweet. Let dessert become nourishment again.
And remember:
There is no right way — just your way. Explore with kindness. Nourish with curiosity.
Well-done! You have completed another step towards making selfcare simple
Before You Save This Recipe for “Later”… Let’s Make Nourishment Something You Actually Get to Enjoy
If this recipe has inspired you, that’s a wonderful place to begin. But if you’re like most of us, inspiration often ends up saved, pinned, or bookmarked — without ever becoming something your body actually gets to enjoy.
Your body doesn’t need more saved ideas. It needs one small, supported step that fits your real life.
The Free Self-Care Start-Up Toolkit helps you turn that “I’ll try this recipe one day” thought into one easy, real-life step that actually nourishes you.
Most people like to complete the Toolkit over a relaxed weekend. It includes short step-by-step videos and simple printables to guide you through choosing your first gentle challenge and preparing to begin without pressure or perfection.
✨ Download the Free Self-Care Start-Up Toolkit
A calm, personalised starting point for your first Nourish challenge.
Inside, you’ll gently discover how to: 🌿 understand what your body may be asking for 🌿 choose one tiny Nourish step that fits your real energy and routine 🌿 begin your first challenge in a way that feels safe and achievable 🌿 notice small benefits without relying on willpower
You’ll also receive: ✉️ monthly Nourish themes & reminders 💬 access to our private community (coming soon)
When your energy is low, even a small mess can feel impossible to face. That’s why I love helping people declutter with the Moon — a gentle, monthly routine that guides you to release clutter one small step at a time, without feeling overwhelmed. Over the year, these little steps add up, turning even the most cluttered corners into calm, manageable spaces.
My Sparkly Sandal Moment
All I needed was my sparkly sandals from last summer. I was already running late, so I grabbed at the bottom of my wardrobe—only to end up surrounded by shoes, bags, and impulse buys. One sandal in my hand, five minutes late, and a familiar wave of frustration rising.
This wasn’t the first time clutter had tripped me up. Sound familiar?
When you experience a ‘bad’ day, energy, health or mood is low, the thought of decluttering can feel impossible. You know the clutter is there — the messy corner, the overstuffed drawer, the wardrobe you avoid opening — but even thinking about sorting it feels overwhelming.
You tell yourself you’ll tackle it “one day,” but life, health, and mood get in the way. And the longer it waits, the heavier it feels.
Here’s the truth: you don’t need to fix everything at once. Small steps, taken regularly, make the difference.
That’s why I love using the Last Quarter Moon as a monthly reminder. This lunar phase is all about release and letting go — the perfect energy to clear just one small space at a time. Over a year, those little steps add up to a calmer home and a lighter mind.
This isn’t about perfection. Which is the last thing you need when you are in the middle of a low health, energy or mood phase.
It’s about reclaiming peace, little by little, with the moon as your guide.
What is Clutter, Really?
At its simplest, clutter is:
Stuff that hasn’t been put away.
Items you haven’t decided about yet.
But clutter is personal:
Some see a messy desk, others see a creative workspace.
Impulse buys, retail therapy, and “just in case” purchases quickly pile up.
Why Clutter Builds Up
Turns out that there are reasons why we have clutter!
It’s not laziness. Clutter often happens because of:
Low energy or time.
Decision fatigue.
Emotional ties or guilt.
Not knowing where to store things.
Buying too much without clearing space first.
Something I found helpful is to ask yourself:
Do I use it, need it, or love it?
Am I keeping it for the past, future, or guilt?
Does it actually have a place in my home?
The Emotional Side of Clutter
Human emotion mind map, positive and negative emotions, flowchart concept for presentations and reports
Clutter isn’t just untidy—it impacts how you feel.
It sparks guilt, stress, or shame.
Negative self-talk (“I should have done this already”) makes it worse.
Decluttering, even a small win, brings calm and control.
As my (tidy) mum says: “When my space is tidy, it feels like everything in my world is alright.”
Benefits of Decluttering
If you still need some convincing or want to have some handy areas to assess your ‘before’ and ‘after’ results with your declutter challenge, I’ve listed some common benefits you can score for yourself.
Physical
Find what you need quickly.
Feel at ease with surprise visitors.
Boost energy and sleep better.
Emotional
Reduce guilt and overwhelm.
Increase confidence and self-worth.
Enjoy the satisfaction of completion.
Deeper
Release the past and make space for new.
Break cycles of procrastination.
Feel lighter, clearer energy in your space.
Short on Time?
You can jump straight to the ‘Recipe’ below.
These quick mood boosters come from the Align & Uplift Challenges, a collection of 5-minute self-care practices you can use anytime to raise your vibration, release stress, and reconnect with your best self.
Decluttering works best as a rhythm, not a one-off.
The Last Quarter Moon (half-moon with the right side dark) is linked to:
Releasing and letting go.
Emotional cleansing.
Reflection and reassessment.
It’s the perfect time to declutter. Each month, this moon phase gives you:
A natural reminder.
Supportive “letting go” energy.
A chance to focus on just one small step.
Last Quarter Moon Dates (UK, 2025–2026)
How to Join the Monthly Declutter Challenge
Step 1: Prepare
Note the dates in your diary.
Pick one small area (drawer, shelf, bag).
Choose a realistic time (30–60 minutes is enough).
Gather bags/boxes: Keep / Donate / Bin.
Set up with a drink, timer, and music.
Step 2: On the Day
Set an intention: “I release what no longer serves me.”
Declutter your chosen area.
Put items straight into their new home, donation bag, or bin.
Stop when your time is up.
Step 3: Celebrate
Notice how the space feels.
Breathe and enjoy the calm.
Remember: one drawer today = more peace tomorrow.
Quick Decluttering Tips
Struggling to get started? These tips can help!
Start small — one drawer, shelf, or type of item.
Ask: Do I use it, need it, or love it?
Hesitating? Decide: Keep, Donate, Bin.
Be kind to yourself — you’ve already had value from items, even if you let them go now.
What to Declutter (Ideas List)
I try to focus on the areas that cause me the most frustration, or stress. Here are some areas to consider.
Cupboards or drawers
Desk or table
Wardrobe, shoes, bags, makeup
Toys, books, coats
Paperwork or digital clutter (emails, photos)
Car
Final Thoughts
Decluttering doesn’t have to mean tackling your whole house in one exhausting go. Using the moon as your guide, you can release a little at a time — without the overwhelm.
Each Last Quarter Moon is a fresh chance. Small steps really do add up.
Well-done! You have completed another step towards making selfcare simple
You Felt a Small Shift Today… Let’s Help You Keep It
That small shift — whether it was a moment of calm, a little more energy, a sense of relief, or simply feeling more like yourself — that is where meaningful change begins.
But on low-sparkle days, it’s easy to lose that feeling. Motivation dips first. Overwhelm creeps in. And even the gentlest intentions fade.
Your body doesn’t need pressure or perfection. It needs one easy mini practice you can return to — especially on days that feel heavy, uncertain, or tense.
The Free Self-Care Start-Up Toolkit helps you turn “I want to feel better” into one easy, real-life step — by helping you choose and begin a challenge you can actually use when your mood dips. Most people like to complete it over a relaxed weekend, and it includes short step-by-step videos and simple printables to help you begin gently.
✨ Download the Free Self-Care Start-Up Toolkit
A calm, supportive starting point for your first Align & Uplift practice.
Inside, you’ll gently discover how to: 🌿 understand where you might need emotional or energetic support 🌿 choose one tiny Align & Uplift practice that fits your real life 🌿 begin without pressure or relying on willpower 🌿 notice subtle shifts that help you feel lighter and more grounded
You’ll also receive: ✉️ weekly reminders to support your consistency 💬 access to our private community (coming soon)
Make Self Care Simple shares general self-care education for inspiration only. I’m not providing medical advice — always check what’s right for you with a qualified health professional.
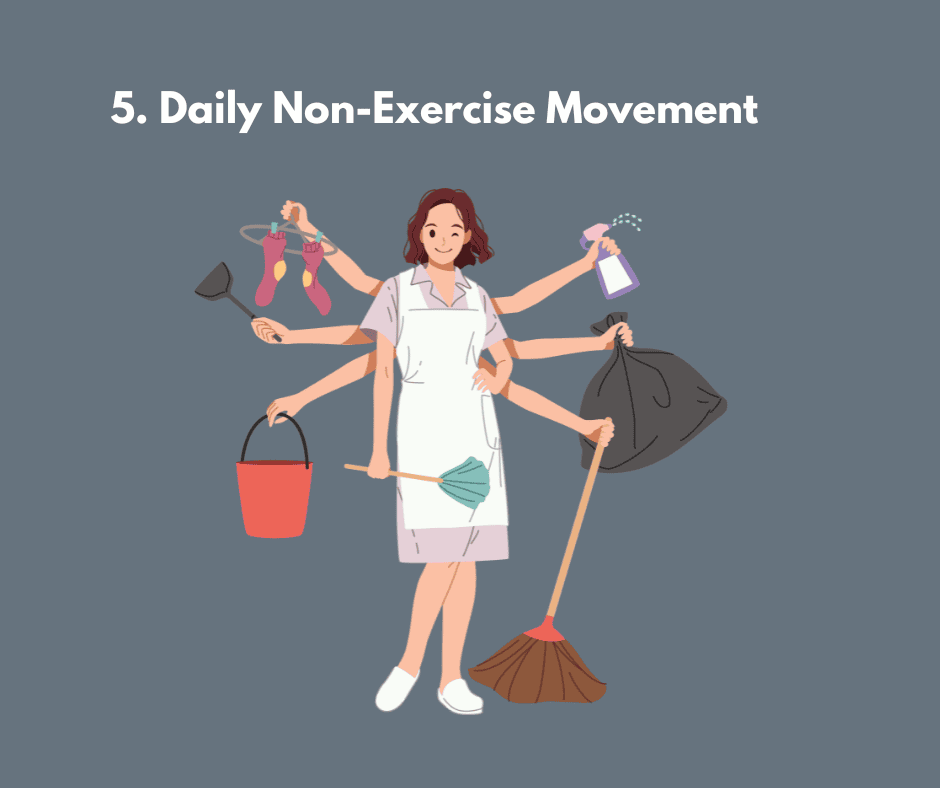
Curious to find out what a 28-day Non-Exercise movement challenge is all about?
If you live with mobility issues, chronic pain, fatigue, or other health conditions, exercise can feel like a loaded word — or even impossible. But movement — in all its gentle, creative forms — is a foundation for energy, healing, and happiness.
So how do you get the benefits of exercise when traditional workouts aren’t an option?
That’s the question I had to ask myself — and it led me to discover something called NEAT movement: all the small, everyday ways we move that quietly support our circulation, mood, and metabolism.
It turns out, the magic isn’t in the gym — it’s in the little things you already do (and the ones you forgot count). Like pottering in the garden, dancing in the kitchen, stretching during the kettle boil, or chasing the cat off the sofa for the fifth time.
Whether you use a wheelchair, live with fatigue, or just haven’t found your rhythm yet, NEAT is about meeting your body where it is — and helping it move a little more freely, one small step (or stretch) at a time.
If you have a serious health condition, always read and discuss any self-care challenge with your health provider.
Save for later? ‘Jump to Recipe’ to save/print a summary of this challenge!
NEAT stands forNon-Exercise Activity Thermogenesis, or simply “non-exercise movement.” It’s all the activity you do that isn’t formal exercise — walking to make tea, stretching, tidying, or fidgeting.
Our bodies were designed for small bursts of movement all day long. But modern life keeps us sitting — working, driving, scrolling, watching — and even those who exercise a few times a week may still spend hours sedentary.
Researchers now say that sitting is the new smoking, with serious health effects over time.
The good news? You can reverse that trend — gently and simply — with small, regular movement.
The Benefits of Gentle Daily Movement
Even a little extra movement throughout your day can make a big difference. Here are some of the key benefits of increasing your non-exercise movement:
Supports muscle recovery
Reduces stress and tension
Improves cardiovascular health
Helps control blood sugar levels
Reduces inflammation
Boosts mood and mental clarity
Burns calories naturally
Is gentle on joints and fatigue-friendly
Because it’s low-impact and energy-efficient, non-exercise movement is especially helpful for those managing chronic illness or fatigue.
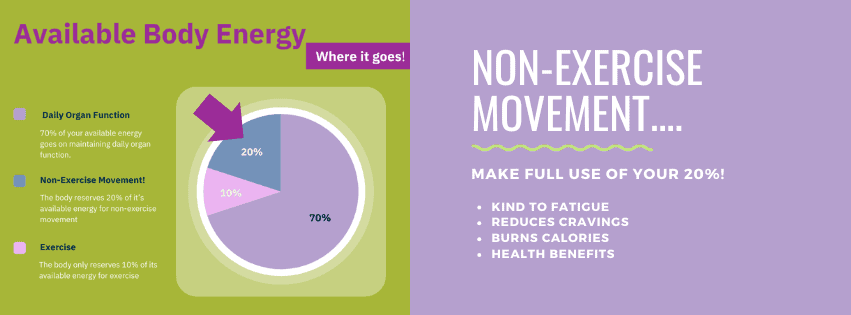
Fun fact: around 70% of your energy fuels daily body functions, 10% goes to intense exercise, and the remaining 20% is available for NEAT movement. This challenge helps you make the most of that 20%!
Before you Begin.
Take a moment to notice how active you are each day. Maybe you move plenty on “good” days, but sit for long stretches on “bad” days. Or perhaps you work out occasionally but spend most of the day sitting.
Wherever you’re starting from is perfectly fine — this challenge meets you there.
How to do the 28-day Non-Exercise Movement Challenge
Like any workout plan, this challenge gives you structure — but the focus is on small, realistic actions.
You can track time (minutes per day) or repetitions (reps).
Here’s how:
Choose your movement(s) for the week or full 28 days.
Plan how many minutes or reps you’ll do each day.
Spread them throughout your day (5-minute bursts are great!).
Track your progress daily.
Increase gently each week.
Celebrate at the end of 28 days!
Just like with regular exercise you need to set yourself a simple workout plan to follow.
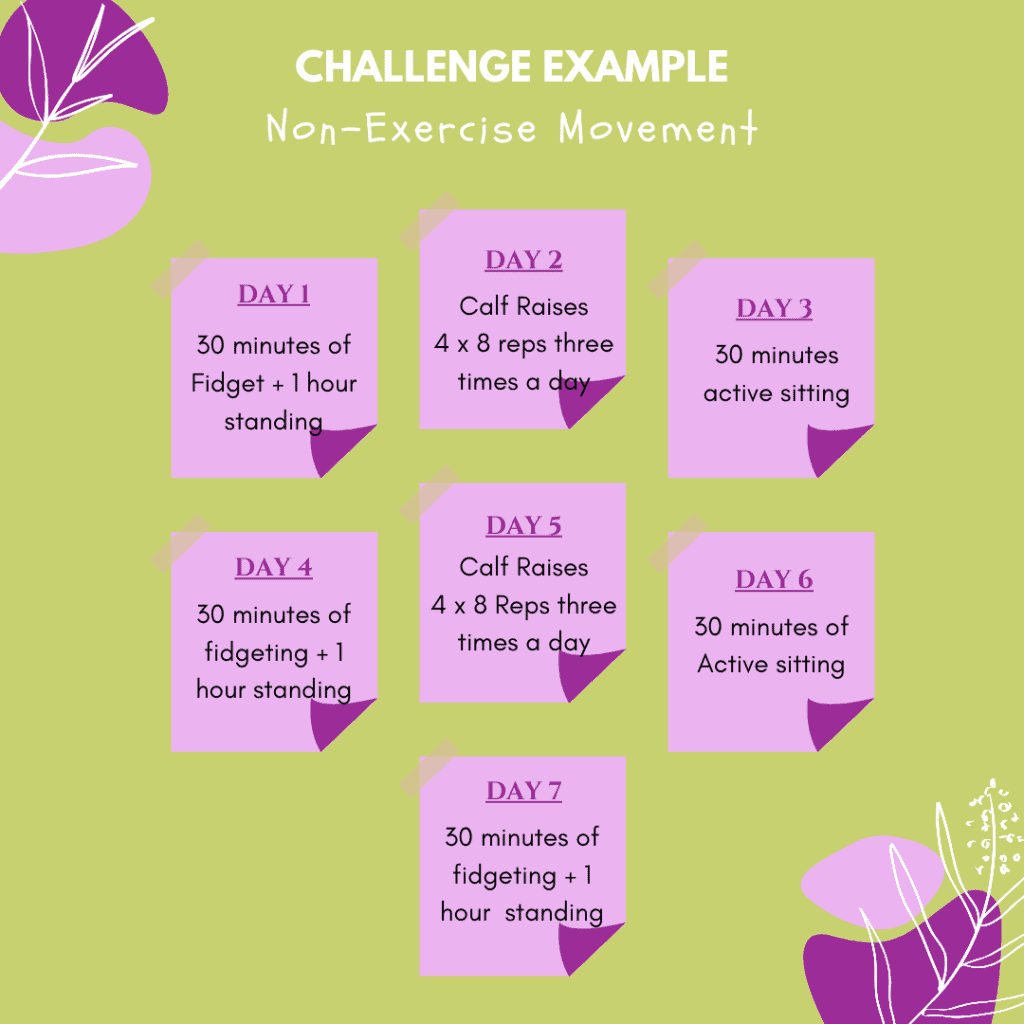
See my example below.
The real challenge here is being consistent – for 28-days. Don’t forget I have included FREE support such as a daily tracker for movement HERE.
Five Mini Challenges to Try
You can try one challenge each week or mix them depending on your energy. They’re flexible — designed for “good days” and “bad days” alike. By the end of 28 days, you’ll have built a powerful new movement habit!
Prefer a quick overview of this challenge? I’ve got you – ‘Jump to recipe’!
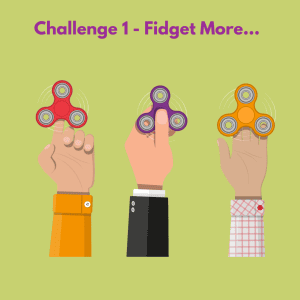
Fidgeting is a surprising hero of Non-exercise and is a perfect challenge for ‘bad’ days. Positive fidgeting can help stop or relieve bad habits and worry. Research Link.
Perfect for low-energy days. Even small fidgets (toe-tapping, shoulder rolls, finger tapping) count! Try 5-minute “fidget breaks” during TV ads or while waiting for your tea to brew.
Challenge 2 – Stand more this week
Standing burns nearly twice as many calories as sitting and boosts circulation. Try to stand for one extra hour each day — perhaps during calls, reading, or watching videos.
Where can you stand more in daily life?
Challenge 3 – Active sitting challenge
What if you can’t stand or walk and need to sit for hours at a time?
If standing or walking is tough, active sitting is ideal. Set a timer for every hour you’re seated and do gentle seated movements for 5 minutes — shoulder rolls, leg lifts, side bends.
Start by aiming for 5 minutes at a time. If you know you sit for many hours each day, you might like to challenge yourself to 5 minutes of active sitting every hour.
Challenge 4 – Calf raises this week
Your Calf is described as the ‘2nd heart’, it is that important to circulation in the lower part of your body! Calf raises are simple, effective, and can be done anywhere — seated, standing, or supported.
How to:
Sit or stand with feet flat.
Lift heels off the floor, pause, then lower back down.
Repeat 10–15 times a few times a day.
Benefits: improved circulation, better balance, and stronger lower legs.
Challenge 5 – Move more in daily life
This is the final challenge and is probably the most well-known way to increase your NEAT Movement.
How many ways can you find to walk, pace, bend, and stretch in daily life?
The aim for this challenge is to add up all the minutes you are already active through normal daily lifeand increase the time.
This can transform your motivation to doing chores around the home!
You’ve completed your 28-Day Non-Exercise Movement Challenge — and that’s worth celebrating! Whether you stretched a little more, stood up a little more often, or simply noticed how your body feels when it moves, you’ve made real progress.
Remember, movement isn’t about mileage or minutes — it’s about momentum. Every reach, roll, twist, or shuffle counts (yes, even the one where you danced to the kettle).
Even small improvements in energy, mood, flexibility, or confidence mean success. You can repeat the challenge each month, set a new personal best, or just keep your favourite micro-moves woven into everyday life.
Because Non-Exercise Movement isn’t something to tick off and forget — it’s something to live. It’s your gentle reminder that movement still belongs to you, whatever your starting point.
“Progress, not perfection — one small, joyful move at a time.”
Well-done! You have completed another step towards making selfcare simple
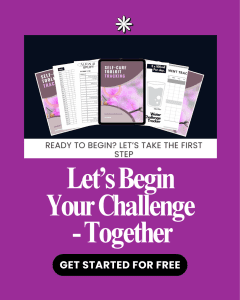
Take the First Step…
We’ve all done it — promised ourselves we’d start that new healthy habit “tomorrow,” and felt oddly proud of the plan… until tomorrow never comes.
The truth is, self-care doesn’t need a perfect day — just a small, curious step today.
Your body learns from action, not intention. The Self-Care Start-Up Toolkit helps you turn what you’ve learned into action — so your self-care finally becomes real, simple, and yours.
Self-care doesn’t need a perfect day — just a small, curious step today.
The Self-Care Start-Up Toolkit helps you turn what you’ve been reading into simple, real-world action, so your self-care becomes personal, doable, and yours.
If you’ve been thinking, “I’d love to try this myself one day…” — you don’t need to wait or wonder where to start.
The toolkit gives you gentle structure to complete your first self-care challenge in a way that fits your body and your life.
Inside the toolkit, you’ll find: 🌿 short video walkthroughs to help you choose and complete your first challenge
🌿 Printable planners, reflections, and trackers to help you stay consistent 🌿 A calm, step-by-step approach you can follow at your own pace
Some people like to follow the challenges quietly on their own. Others find it supportive to explore self-care alongside others.
If that feels helpful, there’s also a free, private community that sits alongside the blog and toolkit — a calm space for reflection, shared noticing, or simply staying connected while you explore.
👉 Explore the free community
Ongoing support (very light)
You’ll also receive gentle self-care reminders, new challenges, and reflections via the Make Self-Care Simple newsletter.
(Part of the Practical Self-Care Pathway — build habits that support your body’s natural balance.)
Real self-care is about listening to yourself. Because being healthy isn’t always easy — but it can be made simple.
“Instant access—start your challenge today.”
Make Self Care Simple shares general self-care education for inspiration only. I’m not providing medical advice — always check what’s right for you with a qualified health professional.
Constipation can creep in when life, stress, or medication slow your natural rhythm. If you can’t rely on usual remedies, this gentle 28-day challenge helps you find relief through simple self-care — no harsh laxatives, just small, body-kind actions that work. Over four weeks, you’ll layer five natural practices that reawaken your digestion and support colon health: hydrate more deeply, move with ease, strengthen your core with mindful breathing, nourish with the right foods, and learn to relax your body so your bowel can do its job.
A few months ago, I found myself in a familiar but frustrating place — sitting with that heavy, uncomfortable feeling of a sluggish bowel and knowing that my usual remedies weren’t an option.
(If you’ve ever found yourself Googling “natural constipation remedies” at midnight with a hot water bottle, you’re in good company.)
After years of managing post-COVID health issues, SIBO (small intestinal bacterial overgrowth), and histamine sensitivities, even gentle herbal or over-the-counter aids became impossible for me to tolerate.
So there I was, staring at my herbal cupboard — full of things I used to rely on — and realising I’d have to start again, from scratch.
What do you do when you can’t take the usual things that keep your digestion moving?
That question became the seed for this challenge. I needed a way to support my body naturally — no harsh remedies, no quick fixes. Just practical self-care.
The result was a 28-day experiment that helped me reconnect with my body’s natural rhythm. And it might just help you, too.
Because let’s be honest — when your digestion’s off, everything feels off
Why the Colon Deserves Your Care
In my natural healing training, one lesson was repeated often: ‘Every healing journey begins with the colon.’ Your colon is like your kitchen bin — when it’s emptied regularly, everything else runs smoothly.
It’s not just about comfort. The colon is your body’s waste-removal system — clearing out toxins, dead cells, old hormones, and indigestible food matter. When waste sits too long, it can affect energy, skin, mood, and overall wellbeing.
Constipation means struggling to pass stool, while a sluggish bowel simply means everything is moving slower than it should.
What a healthy Bowel looks Like
According to continence.org, a healthy bowel movement:
Is soft but well-formed and easy to pass
Happens anywhere from three times a day to three times a week
Takes less than a minute to pass, without pain or straining
Leaves you feeling completely emptied
Healers have always aimed for at least once a day, twice is great, but everyone’s rhythm is unique.
Before you begin: Notice your current pattern. How often do you go? How easy is it? Use this as your ‘before’ snapshot — we’ll revisit it after 28 days.
This is a gentle, body-kind challenge for anyone who needs relief but can’t rely on strong remedies or medications.
You’ll be building five foundational self-care habits that support natural bowel movement. Each practice is simple, safe, and nourishing — no drastic changes, just steady consistency.
How it works:
Begin with Practice One and follow it for 3–5 days.
Then add the next practice, keeping both going.
Continue until all five are part of your daily rhythm.
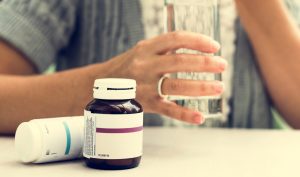
If you’re currently using prescribed medication or constipation aids, continue as needed while layering these practices in slowly.
Medical Patient Drug Care Concept
Ready to Start?
Here are the 5 self-care practices that used together, consistently, can help to Ease Constipation, naturally.
1. Drink more Water – the simplest shift that changes everything
Your colon can’t do its job without moisture — it’s like trying to wash dishes without water in the sink.
If you already drink about two litres a day, wonderful. For everyone else, begin increasing your plain water intake gradually over a few days. Even one extra glass can make a noticeable difference.
Tip: Keep a glass by your bed and drink it before your morning coffee or tea.
Reflection: Notice if your stool softens or if your morning routine feels smoother after a week.
Struggle to drink water? Follow this simple drink more water challenge and increase the amount throughout the 28-day challenge.
I found increasing the amount of plain water I drink through the day makes a surprising improvement – try it for 5 days!
Move More
2. Move More to activate the Bowel
Your colon loves movement — it’s stimulated by walking, stretching, twisting, and even gentle bending. You don’t have to ‘work out’; you just need to move.
Try a 10-minute walk after meals or a few gentle yoga or Qi Gong poses. Movement encourages peristalsis — those wave-like muscle contractions that keep things flowing through your intestines.
If you’re managing fatigue or low-energy days, try my non-exercise movement challenge — even two minutes of swaying or stretching counts.
Reflection: Which small daily movement leaves your belly feeling calmer or lighter?
I took for granted the many benefits of having always been active, until my life changed and the daily 8000+ steps I’d walked for the previous 25 years stopped
3. Abdominal ‘Zip-Up’ Breathing — Strengthen Your Core, Stimulate Your Bowel
This gentle exercise strengthens your deep core muscles and activates your bowel’s natural movement. It’s simple, subtle, and surprisingly powerful.
How to practice: 1. Sit or lie comfortably. Place one hand on your lower belly. 2. Breathe in slowly through your nose — let your belly fill and expand outward. 3. Breathe out through your mouth — gently draw your belly inward and zip-up from your pelvic floor all the way to your ribs, as if fastening an invisible zipper. 4. Relax and repeat for one to two minutes.
Each ‘zip-up’ strengthens your abdominal wall, tones your core, and gives your colon a natural massage — helping to ease sluggishness and support peristalsis.
Reflection: Try this after waking or before bed for a week. Notice if your belly feels lighter or more responsive.
This simple breathing exercise has been so simple and helpful, even on those ‘bad’ days when everything else is too much.
4. Foods That Help (and Hinder) a Sluggish Bowel
Foods to ease constipation
Food can be both medicine and message — it tells your gut how to behave.
Experiment with adding foods that are naturally supportive: – Ripe fruits like figs, dates, or prunes (if tolerated) – Leafy greens — kale, lettuce, or baby spinach – Flaxseed or chia soaked overnight and added to porridge or smoothies – Unheated oils like olive or MCT drizzled over salads or soups
If you’re sensitive to histamines or SIBO triggers, start small. A simple green salad with olive oil or a mint tea with wheatgrass powder can help.
Notice foods that slow you down — heavy meat, eggs, refined wheat, or too many resistant starches like potatoes and rice. Try easing off one of these groups for a few days.
Reflection: Which foods feel like they flow through you — and which ones seem to sit and stall?
At the time I created this challenge I was following a very restricted diet, which caused my digestion to struggle – soaked flax seeds became my best friend.
5. Relax the Colon – Destress to Digest
Taking a rest!
It’s easy to forget that tension in the body equals tension in the bowel. Relaxation is not a luxury here; it’s medicine.
In herbal medicine we used a group of herbs called ‘nervines’ to help relax a tense body and ease stress away and often helped a ‘tense tight colon’.
Try an Epsom salt bath, gentle stretching before bed, or sipping chamomile tea. Magnesium — whether through food, oil, or bath — can help the body (and bowel) relax, but do check if it suits your sensitivities.
Other gentle ways to tone your nervous system include slow breathing, yoga, and even soft humming — all wonderful for the vagus nerve.
Reflection: End each day with one moment of release — a sigh, a bath, or a few deep breaths. Notice what shifts when you truly let go.
Don’t forget to relax the mind as well as the body.
After 28 days — Reflect, Reset, and Continue
At the end of your challenge, return to your ‘before’ notes. Compare how you felt then with how you feel now.
Has your bowel rhythm changed? Do you feel lighter, less bloated, or more comfortable in your body?
Even small improvements matter — they show that your body is listening and responding.
If these gentle habits helped, keep them as part of your Personal Self-Care Menu. You can repeat the challenge anytime or combine it with other Make Self-Care Simple practices.
A Gentle Closing Thought
This challenge began from my own moment of frustration — and turned into a lesson in trust. My body didn’t need stronger remedies. It needed kindness, patience, and consistency.
Real self-care isn’t about doing more — it’s about doing what truly matters.
Your body already knows how to find balance. These simple daily actions just give it the chance to remember.
Well-done! You have completed another step towards making selfcare simple
Take the First Step…
We’ve all done it — promised ourselves we’d start that new healthy habit “tomorrow,” and felt oddly proud of the plan… until tomorrow never comes.
The truth is, self-care doesn’t need a perfect day — just a small, curious step today. Your body learns from action, not intention.
The Self-Care Start-Up Toolkit helps you turn what you’ve learned into action — so your self-care finally becomes real, simple, and yours.
Free Self-Care Start-Up Toolkit
Turn inspiration into lasting results — with a simple system that helps self-care finally work with your body, not against it.
If you’ve been reading along and thinking, “I’d love to try this myself one day…” — you don’t have to wait, or wonder where to start.
The Free Self-Care Start-Up Toolkit gives you the gentle structure to make your first challenge easy, personal, and effective. It’s the same step-by-step approach I use when following the challenges alongside you — so you’ll feel supported every step of the way.
Inside, you’ll find: 🌿 A gentle Before Assessment to pinpoint what your body truly needs — so you can stop guessing and start seeing real results 🌿 Step-by-step guidance (plus short video walkthroughs) to choose the right self-care challenge for your needs — and actually complete it. 🌿 Printable planners, reflections, and trackers to help you stay consistent 🌿 Access to our private community (coming soon!) — for gentle accountability and encouragement
You’ll also receive: 💌 Weekly self-care reminders, new challenges, and encouragement in the Make Self-Care Simple newsletter 🪴 Access to our free private community — where women share progress, celebrate wins, and remind each other we’re not alone
👉Send Me My Free Toolkit (Part of the Practical Self-Care Pathway — build habits that support your body’s natural balance.)
Real self-care is about listening to yourself. Because being healthy isn’t always easy — but it can be made simple.
Ease Constipation Naturally: A 28-Day Self-Care Challenge for a Happier Gut
Notes
Goal: Support a healthy, natural bowel rhythm in 28 days. Serves: One happy gut 😊Steps: 1️⃣ Drink More Water — Aim for around 2 litres daily; add gradually if you’re not there yet. Hydration softens stools and keeps things moving. 2️⃣ Move More — Take a 10-minute walk, stretch, or do gentle yoga each day to stimulate bowel motility. 3️⃣ Zip-Up Breathing — Inhale and let your belly expand; exhale and gently draw your belly in, “zipping up” from bottom to top. Repeat 1–2 minutes daily. 4️⃣ Eat to Support Flow — Include leafy greens, soaked seeds, or healthy oils; reduce foods that slow you down such as heavy meats or refined grains. 5️⃣ Relax to Digest — Create calm with deep breathing, Epsom salt baths, or quiet moments before bed; tension in the body tightens the bowel.Reminder: Build one practice every 3–5 days until all five become part of your daily rhythm. Small, consistent steps create lasting change.
Make Self Care Simple shares general self-care education for inspiration only. I’m not providing medical advice — always check what’s right for you with a qualified health professional.
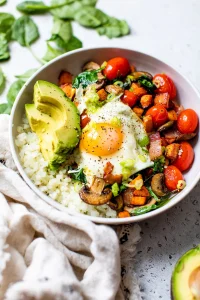
Nourishing savoury breakfast bowls you can adapt your way. High-protein, veggie-rich ideas for stable energy, fullness and balanced mornings
Explore grounding, protein-rich, savoury breakfast bowls that support stable energy, sustained fullness, and a calm, steady start to your day. These simple recipes can be adapted to suit your own needs, taste and lifestyle — making them perfect for this month’s Nourish Challenge.
Welcome to This Month’s Nourish Inspiration
This month, we’re shifting our focus toward something deeply supportive for many people:
If you’re new to the Nourish Pathway, you can learn how it works and why we explore one theme each month here
A savoury breakfast.
While sweet breakfasts can be wonderful, savoury meals often offer:
• more stable blood sugar • longer-lasting energy • fewer cravings later in the day • more protein and vegetables early on • a calm, grounded start
For years, I didn’t realise how much breakfast influenced the rest of my day — my mood, my focus, even my motivation.
Savoury bowls bring warmth, comfort and nourishment in a simple, adaptable way.
Why Savoury Breakfast Bowls?
Because you can build them just like a Nourish challenge:
✨ one grounding base ✨ one source of protein ✨ one or two vegetables ✨ herbs, spices + flavour ✨ adapted to your needs
Small tweaks make the same bowl work beautifully across preferences — vegan, gluten-free, high-protein, low-FODMAP, or simply what your body wants today.
Featured Savoury Breakfast Bowls to Try
Here are some inspiring recipes from food bloggers — feel free to adapt ingredients and flavours to suit your needs.
Veggie Breakfast Bowl
From wholesomemood.com – A colourful mix of veggies, quinoa + eggs — energising, customisable, easy to prep ahead.
Sweet Potato Breakfast Bowl
From kitchenmartha.com – Warm, comforting and naturally sweetened. Add nuts, seeds or yoghurt to balance the bowl.
Hearty Mediterranean Breakfast Bowl
From tidyrecipes.com – Quinoa, roasted chickpeas, cherry tomatoes + herbs — vibrant and protein-rich.
Middle Eastern Breakfast Bowl
From kaynutrition.com – Creamy labneh, poached eggs + warming spices. Gentle, creamy and satisfying.
Savory Tofu Breakfast Bowl
From mytriedrecipes.com – A hearty, plant-based bowl — similar comfort to scrambled eggs but totally vegan.
Scrambled Tofu Breakfast Bowl
From ilovevegan.com – Comforting and warm — a lovely bridge between light and hearty in the mornings.
Gyeran Bap (Korean Egg Rice)
From christieathome.com – Simple, soothing, budget-friendly — rice + egg + sesame. Big flavour, minimal effort.
Crispy Rice Bowl with Egg & Avocado
From themakermakes.com – Crispy rice, greens + avocado with soy-ginger sauce. Excellent for batch prep.
Lentil & Sweet Potato Breakfast Bowl
From thepalatablelife.com – Soft-boiled eggs + tahini dressing — 35g protein and beautifully balanced.
Savoury Oat Breakfast Bowl
From familycooksclub.com – Creamy, risotto-like oats topped with herbs + cheese. A surprise favourite for many.
Cauliflower Breakfast Bowl
From thealmondeater.com – Grain-free + Whole30-friendly with egg + roasted sweet potato & tomato.
Brussels Sprout & Bacon Breakfast Hash
From thehealthyconsultant.com – Low-carb, 20 minutes, topped with baked eggs — big flavour, little effort.
Mexican Breakfast Burrito Bowl
From feastingathome.com – Sweet potatoes, black beans, chorizo (or vegan), avocado + egg/tofu. Bright, bold flavours.
How to Make the Most of This Theme
• Prep one base on Sunday — quinoa, rice, or roasted veg • Add protein for stability + fullness • Choose veg that feel grounding + colourful • Boost flavour with herbs, tahini, miso, pesto • Take a mindful moment with the first few bites breathe, taste, feel the warmth
Ready to Begin?
Choose one bowl that feels good to you this week — hearty, fresh, plant-rich or protein-boosted — and let breakfast become an act of nourishment, calm and care.
If you’d like more monthly food inspiration, you’ll find the full Nourish collection here:
Before You Save This Recipe for “Later”… Let’s Make Nourishment Something You Actually Get to Enjoy
If this recipe has inspired you, that’s a wonderful place to begin. But if you’re like most of us, inspiration often ends up saved, pinned, or bookmarked — without ever becoming something your body actually gets to enjoy.
Your body doesn’t need more saved ideas. It needs one small, supported step that fits your real life.
The Free Self-Care Start-Up Toolkit helps you turn that “I’ll try this recipe one day” thought into one easy, real-life step that actually nourishes you.
Most people like to complete the Toolkit over a relaxed weekend. It includes short step-by-step videos and simple printables to guide you through choosing your first gentle challenge and preparing to begin without pressure or perfection.
Download the Free Self-Care Start-Up Toolkit
A calm, personalised starting point for your first Nourish challenge.
Inside, you’ll gently discover how to: 🌿 understand what your body may be asking for 🌿 choose one tiny Nourish step that fits your real energy and routine 🌿 begin your first challenge in a way that feels safe and achievable 🌿 notice small benefits without relying on willpower
You’ll also receive: ✉️ monthly Nourish themes & reminders 💬 access to our private community (coming soon)
A Bit of History: Being Young at 60 by Horace Fletcher
I have a soft spot for the Old Time Healers — the original self-care pioneers who practiced long before the internet. One of them was Horace Fletcher, who published Fletcherism: What It Is and How I Became Young at 60 back in 1913.
His discovery? That easy weight loss and renewed vitality came simply from chewing your food thoroughly.
Fletcher’s ideas were so popular that even American Presidents, British Prime Ministers, J.H. Kellogg, and King Edward VII reportedly took up “Fletcherism.”
And before you wonder — yes, there’s some modern research to back up this 100-year-old wisdom here, here and here
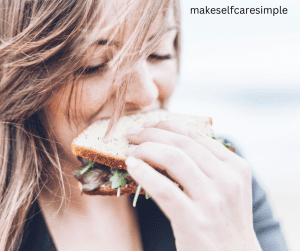
Why Chewing Matters
Chewing: The First Step in Digestion
When you chew, you signal your stomach, gallbladder, and pancreas that food is coming — “get ready!” This allows your stomach to produce the right amount of hydrochloric acid for digestion.
Chewing Produces More Saliva
Saliva is amazing. It contains enzymes that help break down carbs and fats, binds food together for easier swallowing, and even helps clean your mouth by washing away harmful bacteria.
The Problem With Not Chewing Enough
When food isn’t properly chewed, large particles reach the stomach undigested. This causes bacteria to ferment the food, leading to bloating, gas, and indigestion.
On top of that, the stomach doesn’t get the full “digest now” signal, meaning less acid is produced — and that means less nutrient absorption.
Whew! Your body truly is incredible when you let it do its job.
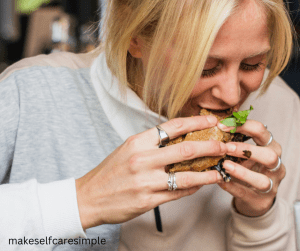
Eating Less (and Enjoying More)
Chewing slows you down. When you eat more slowly, your body has time to send signals to your brain saying, I’m full!
Many of us eat while scrolling, working, or watching TV (guilty as charged), and before we know it — we’re uncomfortably full.
Mindless eating also robs us of enjoyment. Chewing more brings you back into the moment. You taste your food, you feel satisfied, and your portions naturally shrink.
And when you slow down and truly taste what you’re eating, that second biscuit might not seem so tempting.
What do you think? Worth exploring?
How to Do the 28-Day Chewing Challenge
In my clinic, I found that chewing every single mouthful until liquid was too much for most people. It’s ideal — but not always realistic.
So instead, here’s a gentler, more doable approach that still delivers real results.
The 28-Day Chewing Challenge Plan
Assess your health and digestion before you begin.
Chew the first mouthful of every meal until liquid.
Pause and focus: What does it taste like? How does it feel?
Track your progress daily (it really helps!).
Invite friends to join you — self-care is better together.
Then, each week, build on your habit:
Week 1: Chew the first mouthful of every meal.
Week 2: Chew the first two mouthfuls.
Week 3: Chew the first three mouthfuls.
Week 4: Chew the first four mouthfuls.
That’s it — simple, mindful, and easy to remember.
You might want to set a reminder so you don’t forget, especially in the early days.
Chewing Challenge Tips
Start small — focus on just the first mouthful if that’s all you can manage.
Take smaller bites to make chewing easier.
Don’t take another bite or sip until you’ve swallowed.
Sit in a calm environment.
Avoid eating when stressed, angry, or sad.
After 28 days
Time to compare your before-and-after scores.
Did you eat less?
Bloat less?
Slow down and actually enjoy your meals more?
Reflect on what changed — and what made the challenge difficult.
If you didn’t notice much difference, that’s okay! You can always repeat the challenge or move on to another self-care focus.
Conclusion
Congratulations on completing your 28-Day Chewing Challenge! You’ve taken one of the simplest — and most surprisingly powerful — steps toward better digestion, more mindful eating, and improved overall wellbeing.
At first, it might have felt strange to slow down and actually notice each bite (especially if you had an audience at the dinner table), but those moments of awareness are where real change begins.
Keep going — because the longer you practice, the more natural it feels, and the greater your results will be. Many people also find that as they chew more mindfully, their portion sizes naturally adjust, appetite feels calmer, and weight begins to rebalance — all without effort or restriction.
Over time, chewing well becomes less of a challenge and more of a quiet ritual — one that helps you savour food, support your body, and enjoy every meal just a little more.
“It turns out your grandmother was right — good things really do come to those who chew.”
Take the First Step…
We’ve all done it — promised ourselves we’d start that new healthy habit “tomorrow,” and felt oddly proud of the plan… until tomorrow never comes.
The truth is, self-care doesn’t need a perfect day — just a small, curious step today. Your body learns from action, not intention.
The Self-Care Start-Up Toolkit helps you turn what you’ve learned into action — so your self-care finally becomes real, simple, and yours.
Free Self-Care Start-Up Toolkit
Turn inspiration into action — with a simple system that helps self-care finally work with your body, not against it.
If you’ve been reading along and thinking, “I’d love to try this myself one day…” — you don’t have to wait, or wonder where to start.
The Free Self-Care Start-Up Toolkit gives you the gentle structure to make your first challenge easy, personal, and effective. It’s the same step-by-step approach I use when following the challenges alongside you — so you’ll feel supported every step of the way.
Inside, you’ll find: 🌿 A gentle Before Assessment to pinpoint what your body truly needs — so you can stop guessing and start seeing real results 🌿 Step-by-step guidance (plus short video walkthroughs) to choose the right self-care challenge for your needs — and actually complete it. 🌿 Printable planners, reflections, and trackers to help you stay consistent 🌿 Access to our private community (coming soon!) — for gentle accountability and encouragement
You’ll also receive: 💌 Weekly self-care reminders, new challenges, and encouragement in the Make Self-Care Simple newsletter 🪴 Access to our free private community — where women share progress, celebrate wins, and remind each other we’re not alone
👉 Send Me My Free Toolkit (Part of the Practical Self-Care Pathway — build habits that support your body’s natural balance.)
Real self-care is about listening to yourself. Because being healthy isn’t always easy — but it can be made simple.
Make Self Care Simple shares general self-care education for inspiration only. I’m not providing medical advice — always check what’s right for you with a qualified health professional.
28-Day Chewing Challenge; Reduce Bloat, Taste More and Eat Less
Join this simple 28-day chewing challenge and unlock better digestion, enjoy food more, and experience easy weight loss!
Notes
Instructions
1. Assess before you start: Take note of how your digestion, energy, and appetite feel. Write down any symptoms (bloating, heartburn, cravings, fatigue).2. Week-by-week plan:
Week 1: Chew the first mouthful of every meal until liquid.
Week 2: Chew the first two mouthfuls.
Week 3: Chew the first three mouthfuls.
Week 4: Chew the first four mouthfuls.
3. Focus: As you chew, notice the flavour, texture, and how the food changes in your mouth.4. Swallow fully before taking your next bite or sip.5. Track your progress daily. Make notes about digestion, fullness, energy, or cravings.6. Invite a friend to join you — shared challenges build accountability and fun!
For years, my four-legged best friend never let me miss a single sunrise. Rain, frost, or half-open eyes — we were out there, padding through the quiet while the world slowly woke up.
These days, without that wet-nosed alarm clock, I’ll admit it takes a little more persuasion to leave my cosy bed. But every time I do, I’m reminded why it’s worth it.
The morning light has a kind of quiet magic — it steadies your mood, lifts your energy, and helps you feel more balanced all day long.
Over the next 28 days, we’ll explore how a few minutes of early sunlight can: 🌿 Reset your circadian rhythm 🌿 Balance serotonin and melatonin 🌿 Boost calm, focus, and natural energy
It’s completely free, takes just 5–20 minutes a day, and fits easily into your morning — whether that’s a gentle stretch by the window, a walk around the garden, or a proper sunrise stroll (bonus points if you bring your own four-legged motivator).
This challenge is part of the Align & Uplift pathway here on Make Self-Care Simple, designed to help you build your personal toolkit of mood-boosting, energy-balancing practices.
Could sunlight boost your mood?
If you’d love to feel calmer, happier, more focused, experience emotional stability, and wake up refreshed — this challenge is for you.
The best part? It’s completely free, takes only 5–20 minutes a day, and can easily fit into your morning routine.
This challenge is part of the Align & Uplift pathway here on Make Self-Care Simple, designed to help you build your personal toolkit of practices that support emotional and intuitive wellbeing.
Your body is designed to function in response to morning sunlight.
You don’t have to do this every single day, but your energy, sleep, and mood all improve when morning sunlight becomes a regular practice.
Best timing: Within 1 hour of waking and within 2–3 hours of sunrise.
Duration: 5–15 minutes (without sunglasses).
In the UK, sunrise varies widely — from around 4:45 am in midsummer to 8 am in midwinter — so you’ll likely adjust your timing through the seasons. On cloudy or grey days (hello, UK!), aim for 15–30 minutes instead.
Reflect:
How often do you get your morning sunlight?
Where might you make small adjustments?
For 25 years I walked my dogs every morning before work and knew that 80% of the year I was easily getting my morning sunlight.Now I no longer enjoy early morning dog walks this important self-care will be added to my personal menu.
Think this challenge sounds fun? Wait until you try it with my FREE Self-Care Challenge Toolkit—it makes getting results so much easier.
Benefits of the 28-day Sunrise Challenge
Most people know that sunlight boosts vitamin D, which supports your immune system, vitality, and bone health.
But morning sunlight does something even more powerful — it helps regulate your hormones and circadian rhythm, directly improving your mood, focus, and sleep.
Key Benefits
Increases cortisol in the morning (natural energy boost)
Suppresses melatonin (helps you wake up)
Produces serotonin (the “feel-good” hormone)
Morning sunlight and your Circadian Rhythm
Your circadian rhythm is your internal sleep–wake clock. Morning sunlight signals your brain that it’s time to be awake — triggering a cascade of hormone activity that sets your mood and energy for the day.
By aligning with this rhythm through the Sunrise Challenge, you’ll feel:
More alert in the morning
Calmer and more focused during the day
Naturally ready to rest at night
Benefits of Balanced Cortisol
Cortisol isn’t just a “stress hormone.” When balanced, it helps you:
Increase energy and reduce fatigue
Handle stress with more emotional stability
Cortisol also supports: blood sugar balance, inflammation control, blood pressure, metabolism, immune response, and your sleep–wake cycle. Morning sunlight naturally triggers your body’s cortisol spike — giving you energy early and helping you sleep better later.
Benefits of suppressed Melatonin
Melatonin is a hormone that makes you feelrelaxed and sleepy.
You want more melatonin when you want to sleep.
And less melatonin when you need to wake up, focus and have more energy
Morning sunlight helps to regulate melatonin so that you have less in the morning while darkness (sunset) releases more melatonin when you need to sleep.
Benefits of increased serotonin in the morning
Morning sunlight triggers the brain to release more serotonin also called 5-hydroxytryptamine (5-HT) and this is the ‘feel good’ hormone.
When serotonin levels are healthy, you’ll feel:
Happier and more emotionally balanced
Calm yet focused
More mentally clear
Serotonin also supports digestion, bone health, sleep, libido, and memory
Align & uplift Sunrise Challenge
I find it amazing that something as simple as morning light can gently signal all of these responses — like a quiet reminder from nature that it’s time to wake up, move, and feel alive again.
Getting Ready for your 28-day Sunrise Challenge
A few quick questions to set yourself up for success:
What time is sunrise this week?
What time do you need to wake up for 5–15 minutes of sunlight?
What’s the weather forecast — and what will you wear?
Can you create a “sunrise spot” in your garden or near a window?
You might like to jot down how this feels as you go.
How to do the Challenge
Spend 5–15 minutes outside within 1 hour of waking and within 2–3 hours of sunrise for 28 consecutive days.
You can wear contact lenses or regular glasses — just avoid sunglasses that block sunlight.
Because this involves early-morning light, it’s not considered a skin risk. Never look directly at the sun.
That’s it — simple and powerful.
9 Ideas for completing the 28-day Sunrise challenge
Have your breakfast outside
Outdoor tea or coffee break
Exercise outside
Go for a walk
Garden or water your plants
Practice Yoga, Tai Chi or breathing exercises
Read, Journal or work outside
Spend time with your pets or nature
Try an eyes-open mindfulness practice.
Artificial Sunlight
Sometimes natural sunlight just isn’t possible — early starts, winter mornings, or mobility issues can make it tricky.
That’s when artificial sunlight can help.
Sun lamps (10,000 Lux or higher) mimic natural light and support your circadian rhythm.
They’re often used for SAD, sleep issues, or energy regulation.
Always follow manufacturer instructions and check with your optician if you’ll use one regularly.
Tip: Sit near your lamp soon after waking, ideally during your usual sunrise time.
You could also try a sunrise alarm clock, which gradually brightens your room and often includes nature sounds like birdsong — perfect if you:
Struggle to wake up
Have sleep difficulties
Have limited morning time
If budgeting, choose simpler models with quality light over extra features.
Conclusion— One Sunrise at a Time
Are you ready to begin your 28-Day Sunrise Challenge? Even five minutes of morning light can make a difference — to your mood, focus, and how gently your day begins.
You don’t need perfection (or even an early alarm) — just curiosity, and maybe a cosy jumper. Step outside, open the window, or simply turn your face toward the morning light. Notice how it feels.
After the challenge, take a moment to reflect on what’s changed. Has your sleep shifted? Your energy? Your mood? Then simply notice whether this little ritual feels like something you’d like to keep in your life.
Each sunrise is a reminder that your energy resets, too. Your wellbeing matters — and I’m here to help you make caring for it beautifully simple 💛
Well-done! You have completed another step towards making selfcare simple
You Felt a Small Shift Today… Let’s Help You Keep It
That small shift — whether it was a moment of calm, a little more energy, a sense of relief, or simply feeling more like yourself — that is where meaningful change begins.
But on low-sparkle days, it’s easy to lose that feeling. Motivation dips first. Overwhelm creeps in. And even the gentlest intentions fade.
Your body doesn’t need pressure or perfection. It needs one easy mini practice you can return to — especially on days that feel heavy, uncertain, or tense.
The Free Self-Care Start-Up Toolkit helps you turn “I want to feel better” into one easy, real-life step — by helping you choose and begin a challenge you can actually use when your mood dips. Most people like to complete it over a relaxed weekend, and it includes short step-by-step videos and simple printables to help you begin gently.
✨ Download the Free Self-Care Start-Up Toolkit
A calm, supportive starting point for your first Align & Uplift practice.
Inside, you’ll gently discover how to: 🌿 understand where you might need emotional or energetic support 🌿 choose one tiny Align & Uplift practice that fits your real life 🌿 begin without pressure or relying on willpower 🌿 notice subtle shifts that help you feel lighter and more grounded
You’ll also receive: ✉️ weekly reminders to support your consistency 💬 access to our private community (coming soon)
Real self-care is about listening to yourself. Because being healthy isn’t always easy — but it can be made simple.
🪻 Align & Uplift Pathway — reconnect with calm, joy, and emotional balance.
Make Self Care Simple shares general self-care education for inspiration only. I’m not providing medical advice — always check what’s right for you with a qualified health professional.
The challenge is to spend 5 – 15 minutes outside within 1 hour of waking up and 2-3 hours of Sun Rise for 28 consecutive days.
Record your mood daily
Notes
28-day Sunrise Challenge
This challenges enhances your natural circadian cycle helping you balance your serotonin, melatonin and cortisol levels which improves your mood.Try to look in the general direction of the sun, so that your eyes absorb the light.You can wear contact lenses and normal glasses but avoid sun glasses that block sunlight reaching your eyes.Never look directly into the sun.Record your general mood before you start this challenge.Track your mood daily.At the end of the challenge assess your feedback decide if this self care has helped your wellbeing.Download your FREE Self-Care Challenge Toolkit


")