Tag

health

Browsing

Learn how dry brushing can support lymphatic health, reduce bloat, and refine skin texture in this simple 28-day routine for beginners. Your glow starts here.

When I hit my forties, managing chronic health challenges often left me feeling worn out — and my skin showed it. There were days when my skin looked as tired as I felt, and I wanted to hide it away. Thank goodness I could turn to this self-care practice: a simple daily ritual that takes less than five minutes and leaves both my skin and me feeling renewed.

Your skin is more than just a surface — it’s your largest organ, your first line of defense, and a mirror of your overall well-being. No matter what skin texture or changes you’ve inherited through health, age, or life, you deserve to feel confident and comfortable in it.

That’s why I created this 28-day challenge. It’s easy, quick, and feels amazing — plus you’ll start noticing results fast. The glow isn’t just on the outside; it’s how you feel inside too.

Welcome to the challenge that helps you love the skin you’re in, one simple step at a time.

Jump to Recipe

The very first question to ask is…

Will this Dry Skin Brushing challenge support my well-being?

Is Dry Skin Brushing something that could support your wellbeing needs?

Here are some signs that dry skin brushing could benefit you. 

** Dry skin brushing is not performed on the face

  • Your skin looks dull – has lost its glow
  • Your skin is dry and flaky
  • Skin is more oily
  • Poor skin texture (feel & appearance i.e. skin bumps) and tone (colour)
  • Visible pores and clogged pores
  • Ingrowing hair
  • Skin breakouts
  • Fatigue and tiredness
  • Bloating, puffiness & water retention
  • Frequent headaches
  • Recurring infections such as UTI or colds
  • Constipation

**These are good areas (symptoms) to assess and score before you start the challenge

When to avoid skin brushing

Speak to a health professional first if you are currently undergoing immune-system  treatments, have ongoing skin infections, psoriasis, eczema, open wounds, burns,skin growths or take topical steroid creams.

What is Dry Skin Brushing?

Full disclosure: There are no scientific studies to back this self care practice.

Claims about reducing cellulite have not been proven…

Now that is out of the way – what do we know about dry skin brushing?

Dry Skin Brushing has been practiced for thousands of years – all around the world

  • In Ayurvedic medicine it is called Garshana and traditionally uses a rawsilk or linen sock.
  • In Japan it is called Kanpumasatsu and uses a dry towel
  • In Chinese Medicine it uses dried fruit fibres such as a Loofah
  • The Greek & Romans used copper Strigils
  • In Native American medicine it used corn cobs
  • In Polynesian cultures they used crushed seashells 
  • And the Turks and Russians used the popular body brushing method.

Dry Skin Brushing is performed before a shower when the skin is dry. Use a dry towel, brush or loofah and brush over your skin causing a pleasant friction. You only need to do this for a couple of minutes and use a firm but not hard pressure. Then follow with your regular shower routine.

The general rule is to brush towards your heart.

** If your goal is to reduce lymph congestion (Puffy skin) see links below.

Because Dry Skin Brushing can be stimulating it is recommended to do it earlier in the day. Especially if you have sleep issues.

Honestly it is very simple to do (full instructions below) and feels great.

How Does Dry Skin Brushing Work?

When you brush your dry skin, you loosen dead skin cells, so that they can be washed off and reveal new, smooth and brighter skin cells. 

Dry skin brushing is a form of exfoliation speeding up the process of shedding old skin cells. It is thought that regular exfoliation improves skin texture and tone i.e. pink bumpy skin and enhances body lotion/product absorption.

Another aspect of detoxification is your Lymphatic system. This is like a slow moving canal carrying waste out of the body – that relies on body movement to squeeze it along the body . Old time healers believed dry skin brushing encouraged movement of the Lymph. 

Dry Skin brushing can be helpful as a regular practice if you are unable to be active most of the day. This might result in relief of puffiness and water retention much like massage.

Dry Skin Brushing also activates nerve endings in the skin which is what creates that pleasant tingling and invigorating sensation.

Preparing for your Challenge

Luckily this self care practice is simple to prepare.

You can use any of the following;

  • An existing body towel (not too soft!) long enough to do your back
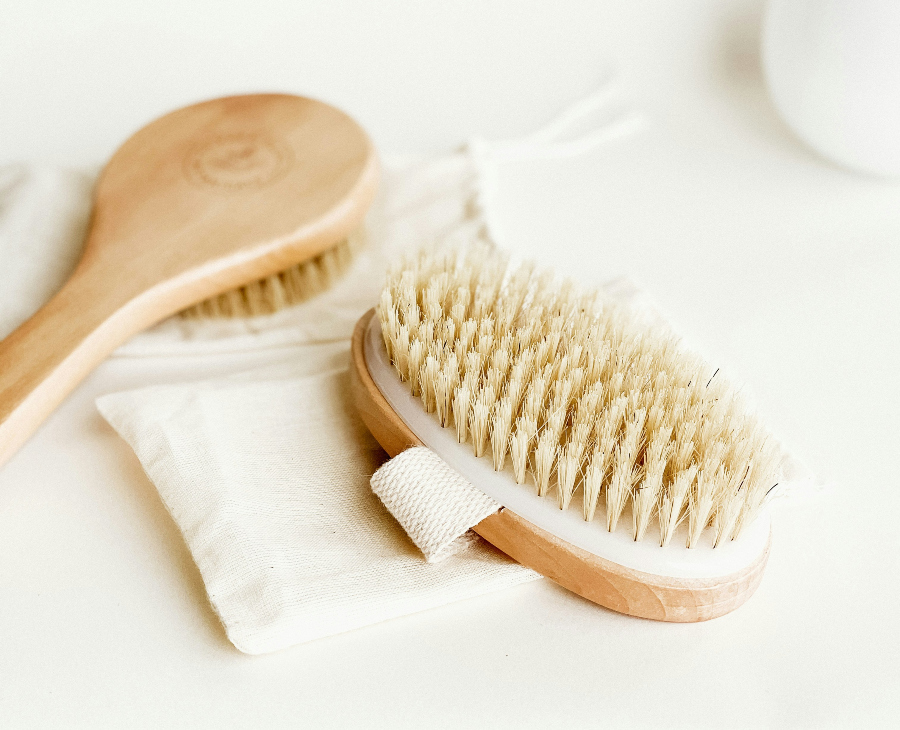
  • A Dry Skin Brush with natural bristles (detachable handles are handy!)
  • A Loofah

Optionally you can dive deeper in which type of Dry Skin Brush to use HERE

dry skin brushes

You will also need to capture details about your before and after assessments and tracking sheets to help you stay consistent.

If you haven’t already, grab my FREE Self Care Starter Pack which includes printables and walks you through the whole process.

How to do the Challenge

For the challenge you only have to do the basic routine at least 3 times a week for 4 weeks (28 days). * You can choose to skin brush every day

Assess and score your overall well-being – especially those areas mentioned at the start of this article – before you begin and again when you complete the dry skin brushing challenge. 

Remember you can use either a dry towel, special dry skin brush or loofah

Basic Routine

  • Start from your feet and brush upwards in long sweeps along the front, back and sides of your legs. Include your buttocks. Medium pressure.
  • Then go from your hands to your shoulder in the same manner. Don’t forget the back of your neck!
  • Use a circular (anticlockwise to mimic the colon and aid the process) movement across your abdomen and then for your armpits.
  • When it comes to your back, I always go upwards in short strokes from the base of my back and downward strokes from my shoulders. Don’t forget your sides under your arms which I do in short strokes.
  • I go very gently if at all, over my chest area and avoid my face

It should take less than 5-minutes.

I have never followed a set number of times to brush each area or complete the routine – my routine is more intuitive. 

Once is fine but if you intuitively feel that you want to do more – do! Remember the benefit comes from repeating the routine 3 times a week for 4 weeks.

Start with a mild pressure – this should not make the skin red and irritated.

Notice how you feel when you have completed your dry skin brush. It should feel good!

Then have your shower as normal.

Tweak the Dry Skin Brushing Challenge to Your Needs

Following the basic routine 3 times a week is enough to see results.

You can also choose to dry skin brush every day. I would not do it more than once a day.

You can also tweak the routine to your needs. If dry skin brushing makes your skin very irritated try a softer pressure or material.

There are detailed routines that work more closely with your lymphatic system which a naturopath might advise to support specific health conditions.

 And of course you can leave out certain areas of your body if you need to.

Advanced Skin Brushing

What if you want to focus mainly on your lymphatic system with dry skin brushing?

I like to combine dry skin brushing with a manual lymphatic drainage routine to open up my lymph nodes first ** Simple challenge coming soon.

You might find it interesting to check out this dry skin brushing technique for lymph movement HERE

Drinking enough water and daily movement will work really well with dry skin brushing.

Assessing your Dry Skin Brushing Challenge Results

At the end of the 28-days you complete another assessment.

What differences did you notice? Write them down. 

I just like how good dry skin brushing feels and how soft my skin feels afterwards and I also know I am helping my body detox better.

How about you? Is this self care practice something you will include in your regular self care menu?

Not sure if you notice any difference?

Not seeing clear results can be frustrating – do you repeat the challenge, keep going anyway or leave it and move on? I have your back with this FREE Guide that can help you decide!

Need help understanding your selfcare results?

Conclusion

Congratulations on completing your 5 Minutes to Feel Good in Your Skin: A 28-Day Dry Brushing Challenge! I really hope you found it helpful, effective and fun!

Remember one month is only enough time to start to notice a difference. Self care works best as a long-term consistent practice.

If you would like support, inspiration and ideas along your journey why not join my newsletter and receive your freebies?

Selfcare toolkit makeselfcaresimple

“Instant access—start your challenge today.”


Make Self Care Simple shares general self-care education for inspiration only. I’m not providing medical advice — always check what’s right for you with a qualified health professional.

©2025 Make Self Care Simple.

Print or save a summary of this challenge in the handy Challenge ‘Recipe’.

5 Minutes to Feel Good in Your Skin

28-day Dry Skin brushing Challenge

Equipment

  • 1 Towel
  • 1 Dry skin brush Optional
  • 1 Loofah Optional

Notes

How to do the Dry Skin Brushing Challenge

For the challenge you only have to do the basic dry skin brushing routine at least 3 times a week for 4 weeks (28 days).
Assess and score your overall well-being – especially those areas mentioned at the start of this article – before you begin and again when you complete the dry skin brushing challenge. 
You can use a dry towel, dry skin brush or loofah.
Basic Dry Skin Brushing Routine
  1. Start from your feet and brush upwards in long sweeps along the front, back and sides of your legs. Include your buttocks. Medium pressure.
  2. Then go from your hands to your shoulder in the same manner. Don’t forget the back of your neck!
  3. Use a circular (anticlockwise to mimic the colon and aid the process) movement across your abdomen and then for your armpits.
  4. When it comes to your back, I always go upwards in short strokes from the base of my back and downward strokes from my shoulders. Don’t forget your sides under your arms which I do in short strokes.
  5. I go very gently if at all, over my chest area and avoid my face 
 
Assess and score at the end of 28 days.
How did you get on?

Join this simple 28-day chewing challenge and unlock better digestion, enjoy food more, and experience easy weight loss!

This powerful self care practice is a breeze, simply chew your food more.

Do you remember a voice from your childhood telling you to chew your food properly? Well turns out it was right!

The benefits are really quite amazing from such a little practice.

I hope you will join me for this fun, simple but effective self care challenge.

Do you need this chewing challenge?

Wondering if simply chewing your food could help your wellbeing?

Here are some signs that you could benefit from the chewing challenge.

  1. You struggle to control your food portions (eat large portions)
  2. You want to release some weight without completing changing your diet
  3. You eat too quickly, never really taste your food
  4. Often feel too full after eating
  5. You suffer with heartburn and acid reflux (GERD)
  6. You suffer with bloating, burping and gas
  7. You suffer with dental issues, gum disease, issues with your jaw.
  8. Nutritional deficiencies such as low in Iron, B vitamins, Magnesium.
  9. You suffer with Low hydrochloric acid symptoms such as fatigue, indigestion and undigested food in stool

If you recognise any of the above, then this chewing challenge is worth exploring!  

*** These are the areas of your health to assess, by describing and scoring, before and after the challenge.

Jump to Recipe

It all started with Being Young at 60 by Horace Fletcher

I am a huge fan of the ‘Old Time Healers’ who were the real lone pioneers of self care long before the internet. And Horace Fletcher is one.

Horace Fletcher published a book in 1913 called ‘Flecterism: What it is and how I became young at 60’.

In summary his answer to easy weight loss and vitality at 60 was to chew, chew, chew your food. I find it fascinating that American Presidents, British Prime Ministers, J.H Kellogg and even King Edward VII reportedly took up Fletcherism.

Don’t worry I did check and there is some modern research to back up this 100 year old bestseller, here, here and here

Benefits of Chewing Your Food more

It always helps to understand why it’s worth making the effort with self care, so here are the benefits of chewing your food.

  1. Chewing is the first step in Digestion

Chewing stimulates nerves to tell the stomach, gallbladder and pancreas that food is coming so go get ready! This signal alerts the stomach to produce enough hydrochloric acid to digest food.

  1. Chewing Produces more Saliva

Saliva contains all sorts of goodies that help your digestion to break down carbs and fat, a lubricant to bind food together and make swallowing easier. Also your mouth is a hot-bed of nasty bacteria and the more you chew the more saliva you produce which is full of antimicrobials which clean your mouth… 

  1. Problem with Food that is not chewed properly

When you don’t chew your food, large particles of food are swallowed and this causes stomach bacteria to multiply and ferment in order to break down these larger particles of food so they can be digested. Excess stomach bacteria causes all sorts of havoc with your digestion such as bloating, gas, indigestion and constipation.

This is all made worse because when you don’t chew the stomach does not get a signal to produce enough hydrochloric acid which makes it difficult for the stomach to digest your food and this also causes indigestion and means the stomach cannot extract nutrients.

Whew! Your body is amazing.

Eating Less with the Chewing Challenge

Chewing makes you eat slower.

And when you eat slower you give your digestion a chance to signal to the brain that it is full. Many of us stuff our faces whilst being entertained by social media, work or TV (I do anyway) and then feel uncomfortably full.

This means you (and me) are mindlessly eating – we pay no attention to what we are eating and before we know it the food is all gone!

It’s the same with comfort eating – you get triggered and that bar of chocolate is gone before you can register its pleasure

What I like about this weight-loss hack is that instead of restricting yourself, the idea is that you eat slower, chew more and increase and prolong the pleasure of the food you are eating.

Honestly I am not sure that chewing more would make me eat less chocolate BUT I do think it would restrict my portion size on everyday meals.

Also slow eating and really paying attention to the taste sensation could stop you from reaching for another biscuit.

What do you think? Worth a exploring this challenge?

How to do the chewing challenge

In the clinic I found that chewing every single mouthful until liquid was problematic for many of my clients.

It just wasn’t doable. 

However if you want to explore chewing every single mouthful until liquid I have no doubt that your results could be amazing! Please let me know how you get on.

Quick note

I have come across chewing for 30 x each mouthful – but the truth is that some foods are softer and easier to chew until liquid than others. So the challenge is to chew until liquid.

The 28-day chewing challenge.

  1. Assess and score your body before you start the challenge.
  2. Chew the FIRST mouthful of every meal until liquid.
  3. Take a moment to really focus on the food – 
  4. How would you describe the taste/flavour?
  5. Complete the challenge (below)
  6. Assess and score your body and well-being after you completed the challenge.
  • For week 1 chew the first mouthful of every meal.
  • For week 2 chew the first two mouthfuls of every meal.
  • For week 3 chew the first three mouthfuls of every meal.
  • For week 4 chew the first four mouthfuls of every meal.

Don’t forget to track your daily progress this helps you stay motivated

Also you may wish to set some kind of reminder so you don’t forget.

Invite friends to join you!

Don’t forget you can sign up and receive free support! HERE

Chewing Challenge Tips

Here are some well-known tips for eating better.

  • Make it easier by only chewing the first mouthful for the full 28-days.
  • Eat small bites that take less time to chew and slow you down.
  • Do not drink liquid or take another bite until you have swallowed
  • Sit in a relaxed environment
  • Do not eat when stressed, angry or sad

After 28 days

This is when you compare your assessment scores.

Where has the chewing challenge made a difference?

Did you eat less? Bloat less? Slow down and enjoy your meals more?

What made this challenge difficult? How did you overcome any hurdles?

Didn’t see any changes? To see if you should repeat the challenge or move on to something else CLICK BELOW.

Conclusion

Well done! Congratulations on completing your Chewing Challenge; Boost Flavour, reduce Bloat and Eat less.

Know that if you decide to repeat the challenge or make it part of your regular Menu of Self care practices that your results will continue to improve

You don’t have to figure it out alone. My FREE Self-Care Challenge Toolkit is here to guide you through your first challenge and help you see results faster.


Make Self Care Simple shares general self-care education for inspiration only. I’m not providing medical advice — always check what’s right for you with a qualified health professional.

©2025 Make Self Care Simple.

Save or Print a handy ‘summary’ of this challenge in the ‘Recipe’ below.

28-Day Chewing Challenge; Reduce Bloat, Taste More and Eat Less

Join this simple 28-day chewing challenge and unlock better digestion, enjoy food more, and experience easy weight loss!

Notes

The 28-day chewing challenge.
  1. Assess and score your body before you start the challenge. Read HERE
  2. Chew the FIRST mouthful of every meal until liquid.
  3. Take a moment to really focus on the food – 
  4. How would you describe the taste/flavour?
  5. Complete the challenge (below)
  6. Assess and score your body and well-being after you completed the challenge.
For week 1 chew the first mouthful of every meal.
For week 2 chew the first two mouthfuls of every meal.
For week 3 chew the first three mouthfuls of every meal.
For week 4 chew the first four mouthfuls of every meal.
Also you may wish to set some kind of reminder so you don’t forget.
Invite friends to join you!
 

Do you sit for long periods of time? Want ideas of how to sit less or stay active while sitting? I’ve put together 65 Fun Non-exercise Movement ideas that also burn calories!

Want to experience health benefits of exercise but your health or situation makes formal exercise or activity impossible?

You are in the right place!

I have listed 65 fun non-exercise movement ideas to burn calories and improve health!

I put these ideas together for the Boost your Wellness with the 28-day non-exercise Movement challenge. (The challenge is based on the benefits of including lots of non-formal-exercise movement (NEAT))

Did I mention Non-Exercise (NEAT) movement also burns calories?

2000 calories difference!

We all know someone who just can’t sit still for very long, turns out all that fidgeting and jumping up to do something that could wait, makes a big difference to your NEAT movement.

One study is reported to show a 2000 calorie difference in a day between two similar people whose only difference was how active their occupation was.

Now weight loss is not my main goal with the non-exercise movement challenge, but it’s cool to know there are simple ways you can keep yourself trim without starving or needing a body well enough to complete intense workouts.

Also releasing unwanted weight has always been a big source of motivation to get started –  if knowing you will also be burning calories motivates you that is an added bonus!

65 Fun Non-exercise Movement Ideas to Burn Calories and Improve Health

In the examples below I have borrowed movement ideas from formal exercise, especially warm-up exercises but the goal is to keep them gentle to mimic daily life.

The goal is to sit less by including short 2-3 minute sessions of non-exercise activity every 30 minutes.

AND how to stay active when you have no choice but to sit for hours at a time.

Exploring these ideas may inspire you to start to include formal exercise each week – that is great!

Just remember you will benefit even more if you include Non-Exercise Movement to your day.

I have split the list into the 5 challenge sections for easy reference.

You can remind yourself of the Boost Your Wellbeing with a 28-day Non-Exercise Movement challenge HERE

Challenge 1 – Ideas to Fidget More this week

65 non-exercise-movement-ideas

Not only will you burn calories, but fidgeting can relieve anxiety, boredom and help with changing bad habits.

Here are some ideas to get you started.

  1. Tapping each finger 5 x
  2. Fist-pump in the air each side 10 x
  3. Tapping toes each foot 10 x (sitting or standing)
  4. Tapping toes both feet 10 x (sitting or standing)
  5. Bouncing heels each foot 10 x
  6. Bouncing heels both feet 10 x
  7. Hand circles – rotate wrists and fingers 10 x both directions
  8. Knitting or crochet
  9. Sketching or colouring
  10. Adult fidget toy – Shashibo
  11. Adult fidget Spinner 

Challenge 2 – Ideas of how to Stand more this week

The benefits of standing more include improved posture, back-pain, circulation and cardiovascular (heart) health, insulin levels (sugar) and boosts focus and concentration

Calories burned between standing-still and sitting were not significant although when you stand for periods of time you are more likely to keep adjusting your posture (fidget). 

Here are some ideas of how you can stand more this week

  1. Stand while on the phone.
  2. Stand at the kitchen counter when using electrical devices.
  3. Stand while ‘crafting’.
  4. Stand in front of the TV or Youtube
  5. Stand doing chores around the home – sprinkle them throughout the day
  6. Stand and take a ‘power pose’ or mountain pose
  7. Stand for 5-minute meditate or listen to short guided visualisation
  8. Stand and perform breathing exercises 
  9. Standing desk – if you work from home this is a great investment.

Challenge 3 – Active sitting Ideas 

Active or dynamic sitting is where you include frequent micro movements while sitting for long periods of time. 

The benefits include improved posture (back, neck, shoulder pain), core-strength and circulation (cardiovascular/heart health).

Seated workouts are a very popular solution for those with restricted mobility or who need to sit for long periods for work. Full Seated-Workouts are classed as formal exercise (which you can also include) YouTube examples Here, here & here.

You can use these workouts for ideas to create micro 2-minute active sitting movements.

Active sitting (fidgeting while seated) burns extra calories (energy expenditure) and if you can move your legs while seated this increases by 20-30%

65-non-exercise-movement-Ideas

Here are 20 ideas to include for micro-active-sitting 

  1. Seated arm rows
  2. Overhead arm raises
  3. Knee lifts
  4. Knee extensions
  5. Seated chair march
  6. Arm swings
  7. Arm reaches
  8. Toe taps
  9. Seated cat cow stretch
  10. Chair forward bend
  11. Chair spinal twist
  12. Neck stretches
  13. Seated Eagle arms Seated bent over rows
  14. Seated shoulder press
  15. Seated bicep curls
  16. Seated triceps extensions 
  17. Rocking Foot stool such as HERE
  18. Under-desk-pedal-bike – Try This.
  19. Office ball chair example Here
  20. Saddle chair

“It’s 100% free—no strings attached.”

Challenge 4 – Ideas to Include More Calf Raises

Calf raises not only burn calories but also strengthen calf muscles which improve lower body function, improve stability and reduce risk to sprains and strains.

Calf-raises also support the ankle and knees.

These can be done seated or standing, on a step and with dumb-bells. 

Remember the Non-Exercise goal is micro 2-minute sessions throughout the day.

Read or watch BELOW how to perform calf raises

How to do simple calf raises

  • Sit or stand with both feet on a flat surface with your toes pointed straight ahead.
  • Lift one or both heels off the floor to flex your calf muscle.
  • Pause for moment, then slowly return to the floor. That’s one rep.

Here are Calf-Raise Variations and Ideas

  1. Lifting both heels together
  2. Lifting one calf at a time (alternate)
  3. Turn feet inward slightly
  4. Turn feet outward slightly 
  5. Add light weights while you perform calf raises
  6. Use a low step to create more of a stretch.

Challenge 5 – Increase daily walking, bending, stretching, twisting.

These are the well-known examples of NEAT movement. The little every day activities and tweaks you can make to gently increase your movement without formal exercise to burn more calories and boost your well-being.

65-NON-EXERCISE-MOVEMENT-IDEAS

How many of the following ideas can you include today?

  1. Pace when you take a phone call.
  2. Park further away so you walk more steps.
  3. Identify where you could stand more in your normal day.
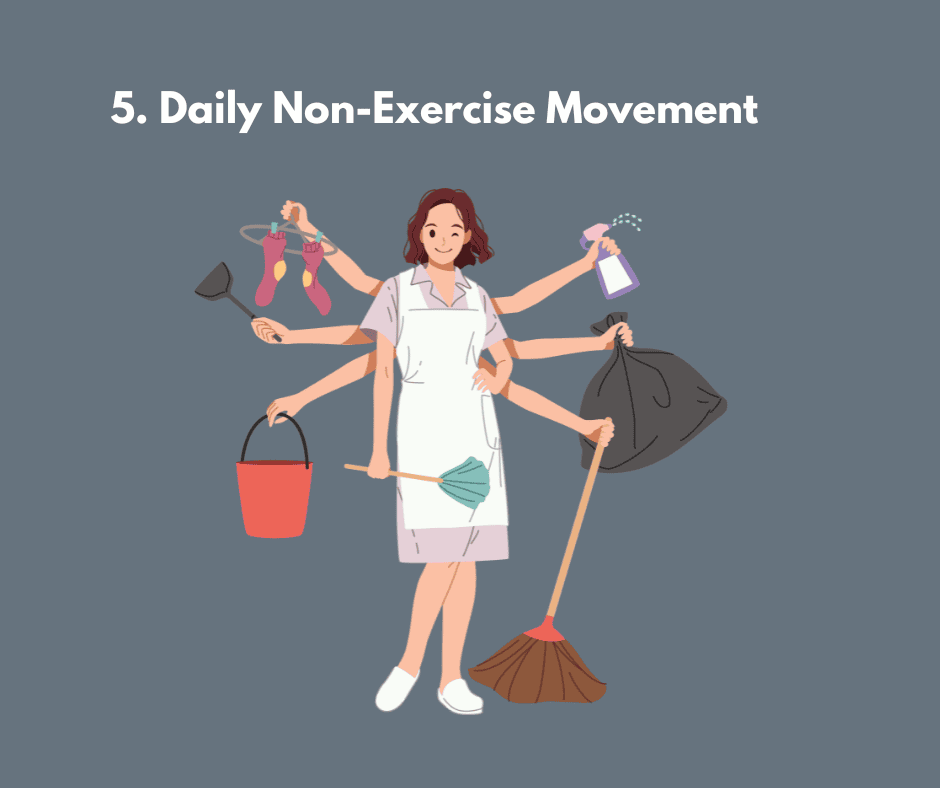
  4.  Housework counts as NEAT – can you increase your daily cleaning activity? How many 5-minute chores can you complete in a day?
  5.  Walk with friends and family
  6. Walk the dog
  7. Clean the car
  8. Gardening counts as NEAT – how many 5-minute jobs can you complete today?
  9. Cooking and clearing up counts as NEAT
  10. Walk whenever you have the choice
  11. Having a shower counts as NEAT
  12. Dancing 
  13. Spending time with kids
  14. Getting up and making a drink
  15.  Warm-up movements from a workout
  16. Squats
  17. Arm swings
  18. Stretch while watching tv
  19. Take the stairs whenever you can

Summary

Whew well done yu made it to the end! So that wraps up my 65 Fun Non-Exercise Movements Ideas to inspire you to take the Challenge HERE

I hope you have found it helpful!

You’ve already taken the first step by being here. Let’s keep going—download your FREE Self-Care Challenge Toolkit today.

“Instant access—start your challenge today.”

Curious to find out what a 28-day Non-Exercise movement challenge is all about?

When you live with mobilty, pain, fatigue or other health issues, exercise can be a tricky topic.

Exercise and movement are a foundational step to keep your body healthy, and prevent future health issues.

But what if you currently live with mobility or breathing issues or debilitating exhaustion or weakness and pain, and exercise is more difficult if not impossible?

How do you reap the benefits of exercise when you struggle with mobility and/or fatigue issues?

It’s a question I had to ask myself – and then search for an answer.

When I came across something called NEAT Movement, I realised I’d found an answer – a form of exercise those with chronic health could harness to boost their well-being.

The cool part is that this will also benefit you if for whatever reason you spend many hours a day sitting, such as driving or office work.

My goal today is to share a simple fun challenge to help you experience the benefits of movement even when you have chronic health issues or struggle with regular exercise.

If you have a serious health condition, always read and discuss any self-care challenge with your health provider.

Save for later? ‘Jump to Recipe’ to save/print a summary of this challenge!

Jump to Recipe

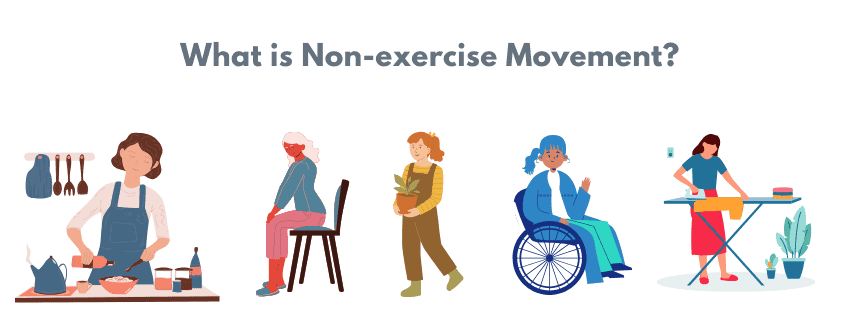
What is non-exercise movement

NEAT stands for Non-Exercise Activity Thermogenesis, which I describe as Non-Exercise Movement, which means any activity you do that isn’t sleep or formal exercise.

Getting up and walking to the kettle and making a drink then walking back to your chair is an example of NEAT exercise.

Your body was designed for many hours of NEAT exercise a day with short bursts of high activity (formal exercise) and enough restful sleep.

We have created a modern life where the brain can be occupied and busy, while the body sits and doesn’t move i.e. transport, office work, TV, mobile phone and gaming.

We continue to find ways to reduce our daily physical activity and make life easier.

Perhaps it’s no surprise that researchers have found that all this sitting, even if we go to the gym a few times a week, is not good for us.

In fact sitting is said to be the new smoking.

Many of us, whether we have health issues or not, can find ourselves sitting for hours at a time. So what can we do?

Benefits of increasing Non-Exercise Movement

Being sedentary is directly associated with more long-term health issues.

The good news is that almost all of us can easily reduce this risk, even with mobility/health issues, which is why I created the Non-Exercise Movement Challenge for you.

Here are some of the health benefits of increasing your NEAT movement.

  • Helps with Muscle recovery
  • Reduces stress
  • Improves cardiovascular health
  • Helps control blood sugar levels
  • Reduces risk of chronic disease
  • Lower levels of inflammation in the body
  • Is kind to your joints (low impact)
  • Improves mood
  • Burns calories

Non-Exercise movement is kinder to Fatigue

Regular exercise such as cardio or weight training while providing many benefits can make fatigue worse and sometimes cravings as well, especially for those with chronic health conditions.

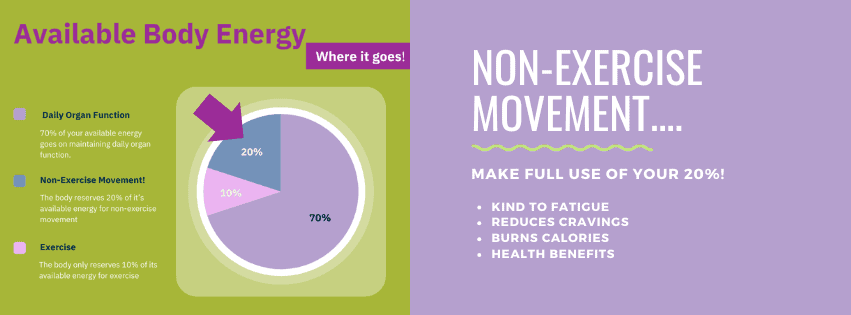
Because it’s gentle action stays under the radar, NEAT movement does not tend to cause fatigue. According to research, 70% of your energy goes to maintaining daily body functions while just 10% of energy is reserved for blasts of intense exercise.

The remaining 20% of energy is allocated for NEAT movement.

The aim of the challenge is to help you make use of your full 20% of available energy.

Just remember the goal is to increase ‘gentle movement’ so you can reap the full benefits.

Non-Exercise Movement Challenge

Do you need this Non-exercise Movement challenge?

How active each day are you?

It’s a good to have a general idea of how active you are before you start the challenge.

When you have chronic health issues you may find that you have ‘good’ and ‘bad’ pain, fatigue and mobility days and this impacts your activity levels.

You may work out every week, and have good fitness levels, but your daily life still involves sitting for many hours a day.

Maybe even carrying out normal daily activity can leave you exhausted.

There are many reasons why you may not be as active as you would like. 

I have tried to find ideas for every situation in the Non-exercise Movement Challenge and hope you will join in.

In this POST I share 65 Fun Non-Exercise Movement Ideas to Try

How to do the Non-Exercise Movement Challenge

Just like with regular exercise you need to set yourself a simple workout plan to follow.

I have offered suggestions, but it is best to set your own goals.

You can choose to plan your daily movements in minutes or reps. Try both and see which motivates you most!

You could set a goal to complete 20, 30 or 40 minutes a day of Non-Exercise Movement. Ideally this could be split into shorter 5-minute sessions throughout the day.

Or

You could set a goal to complete a certain number of repetitions. 

Most works outs include specific movements that are repeated a certain number of times – such as toe taps or lifting weights a certain way. 

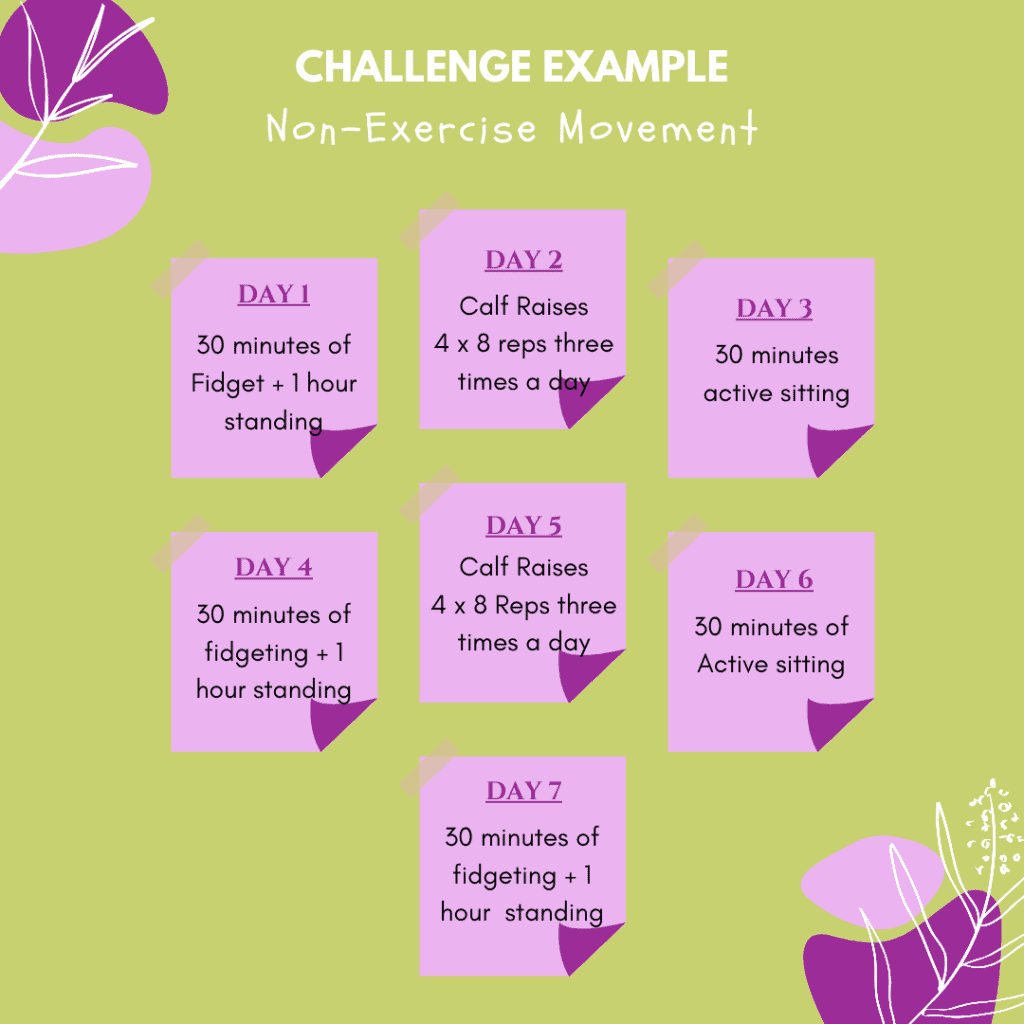
You can create your own Non-Exercise Movement workouts! See my example below.

Non-Exercise Movement Challenge

 Plan your non-exercise movements for the week ahead.

  1. Choose your non-exercise movement/s for the week ahead or full 28-days.
  2. Plan how many minutes or reps of each movement you will do each day – try to spread them throughout the day. 
  3. Track your progress each day.
  4. Increase the challenge gently each week. I.e. increase the minutes or reps.
  5. Celebrate at the end of 28 days with a healthy reward!

Start gently and then increase the amount if you find it easy!

The real challenge here is being consistent – for 28-days. Don’t forget I have included FREE support such as a daily tracker for movement HERE.

28-Day-Movement-Challenge-Boost-Wellbeing-without-exercise

5 variations of Non-Exercise Movement Challenges

I found so many different ideas of how you can increase your non-exercise movement that I decided to split the challenge into 5 different sections.

Each challenge takes one NEAT movement idea for you to try, experience, adapt and keep what works for you.

You decide how you want to do them.

You can choose certain challenges for ‘bad’ days and others for ‘good’ days.

You can start with one week of challenge 1, then move on to ADD challenge 2 for the second week, and so on.

By the end of the 28-days you could be completing all 5 challenges throughout your day

Or you can pick one challenge idea and focus on increasing your daily goal for the 28 days. Then move on to the next challenge and gradually increase that over the following 28 days.

Or any combination that suits you and your situation.

Have a read through the following challenges, and spend some time trying them out before you start the challenge. Don’t forget I also provided you with Ideas for each challenge HERE.

Prefer a quick overview of this challenge? I’ve got you – ‘Jump to recipe’!

Jump to Recipe

Challenge 1 – Fidget more this week

Fidget More- boost wellbeing with 28 day non-exercise movement challenge

Sitting or lying with very little movement will both burn around 50 calories an hour and the lack of movement can cause many health issues long-term.

Fidgeting is a surprising hero of Non-exercise and is a perfect challenge for ‘bad’ days. Positive fidgeting can help stop or relieve bad habits and worry. Research Link.

The trick with fidgeting is to do lots of it on days where you can’t do much else.

 Aim for 5 minutes of fidgeting at a time – you could set a timer. Toe tapping or finger tapping are easy fidgets! 

Fidget through regular ‘waiting’ times such as TV or YouTube adverts!

Challenge 2 – Stand more this week

stand more - boost wellbeing with 28-day non-Exercise Movement challenge

The goal is to challenge yourself to increase the amount of time you stand.

Standing uses up more NEAT energy than sitting, sitting uses about* 50 calories per hour while standing can burn up to 90 calories per hour.

How many minutes a day do you currently stand? Can you increase this?

Can you challenge yourself to stand for 1 extra hour per day each week?

As an example if you sit between 7 and 10pm (3 Hours) challenge yourself to stand 30 minutes (6 x 5 minutes) of that time. 

Where can you stand more in daily life?

Challenge 3 – Active sitting challenge

Active sitting - boost ellbeing with 28-day non-Exercise Movement challenge

What if you can’t stand or walk and need to sit for hours at a time? This Active sitting challenge uses seated workouts as inspiration.

Now an actual 30- or 40-minute seated workout would be classed as exercise – something you may already be doing.

But for NEAT movement we are finding ways to gently move the body throughout your day

Start by aiming for 5 minutes at a time. If you know you sit for many hours each day, you might like to challenge yourself to 5 minutes of active sitting every hour.

 Over time you can keep increasing the amount of time.

Challenge 4 – Calf raises this week

Calf raises - boost wellbeing with 28-day non-exercise movement challenge

How many minutes per day will you challenge yourself to complete?

This challenge can be done seated, assisted standing, standing and advanced with steps and weights.

Calf Raises (Heel lifts) for improved lower body circulation

Calf raises are a fantastic NEAT movement to include every day.

There has been a lot of talk recently about the many benefits of calf raises, including improvements in lower body circulation, in both health and fitness research. 

Strong, flexible calf muscles result in better stability and balance

Calf raises can also prevent many foot and ankle problems such as strains, sprains, splints and Plantar Fasciitis.

Standing (and assisted standing) calf raises activate the two muscles that run down the back of the lower leg: the gastrocnemius and soleus.

Seated calf raises only works the soleus muscle – but you can still receive benefits

How to do simple calf raises

  1. Sit or stand with both feet on a flat surface with your toes pointed straight ahead.
  2. Lift one or both heels off the floor to flex your calf muscle.
  3. Pause for moment, then slowly return to the floor. That’s one rep.

Challenge 5 – Increase your Non-exercise Movement in Daily life

Daily movement - boost wellbeing with 28-day non-exercise movement challenge

This is the final challenge and is probably the most well-known way to increase your NEAT Movement.

How many ways can you find to walk, pace, bend, and stretch in daily life?

The aim for this challenge is to add up all the minutes you are already active through normal daily life and increase the time.

This can transform your motivation to doing chores around the home!

65 Fun Non-Exercise Movement Ideas to Try

There are so many fun ways you can increase your Non-Exercise Movement (and boost your well-being) so I have listed them all together HERE

After 28-days

Don’t forget to compare your before and after assessments, noticing any improvements. If you have to start gently and slowly build up – keep going – as it may take a few months for you to notice improvements in your well-being.

Just like with regular exercise work-outs you can track your progress, noticing how you are able to increase the amount and intensity over weeks and months.

Remember Non-exercise movement is something we should include every day for life.

Need inspiration and Ideas of what exercises to include in this challenge?

65-Fun-non-exercise-movement-Ideas

Summary

The key with all these challenges is to be as consistent as you can over the 28 days. Find ways to make it fun, such as asking a friend to join you and getting creative with your tracking.

Don’t forget you can sign-up to the make-selfcare-simple newsletter and join me as I complete the challenges with you and share free resources such as tracking and motivation.

Think of this as a little gift to get you started—a clear, simple plan for your first self-care challenge. Grab your FREE Toolkit now.

“Instant access—start your challenge today.”

Want to Save or Print a summary of this challenge? Click on this handy ‘Challenge Recipe’!

28-Day Non-Exercise Movement Challenge

Reap the benefits of Movement even when your health doesn't allow you to exercise

Instructions

  • Assess & score your well-being (Symptoms) before you begin
  • Add more Non-Exercise Movement each day for 28-days
  • After 28 days Assess & score your wellbeing (Symptoms)
  • Decide if you wish to add this to your Self-care Menu

Notes

So, first read the whole challenge.
I have split non-exercise Movement into 5 sections for you to explore.
  1. Fidget more
  2. Stand more
  3. Active Sitting
  4. Calf Raises
  5. Non Exercise Movement in Daily Life
 
  • Choose your non-exercise movement/s for the week ahead or full 28-days.
  • Plan how many minutes or reps of each movement you will do each day – try to spread them through the day. 
  • Track your progress each day.
  • Increase the challenge gently each week. I.e. increase the minutes or reps.
  • Celebrate at the end of 28 days with a healthy reward!
  • Decide if you will keep Non-Exercise Movement as part of your Self-Care menu
You may like to spread this challenge over several months.
Don’t forget you can also grab your free Selfcare Toolkit HERE

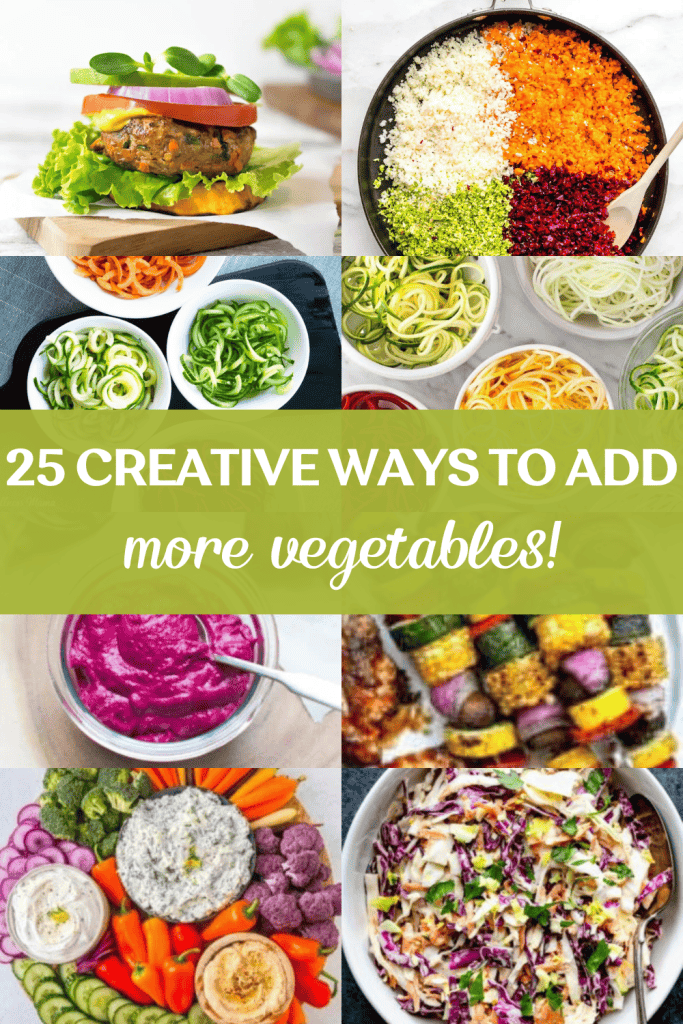
Find vegetables boring?

Discover this round up of 25 creative ways to add more vegetables to your diet.

I personally found that some of the vegetables that could support my health needs the best, were not always my favourites.

So I would avoid including them, even though they might help.

Many of us want to include more vegetables, but struggle for different reasons, which is why I created the 28-day-Eat-More-Vegetable-Challenge.

New to the Monthly Nourish Challenge?
Each month we explore one food theme together and adapt recipes to suit our own dietary needs. Click here to learn more about how the challenge works.

Check out the amazing recipes and creative food bloggers below!

1.      Hide them in curries

hungryhealthyhappy.com suggests

A super easy and healthy Slow Cooker Chicken Curry that takes less than 5 minutes to prep. Easy to adapt, lots of green vegetables and it freezes well too. A tomato based, creamy curry sauce with tender chunks of chicken and some spinach for a green boost. A family favourite with minimal effort!

I have to be careful with spices as many are high histamine but I have found I can tolerate moroccan spices. How about you?

2.      Hide them in mash

carefreekitchen.com suggests

These creamy Mashed Root Vegetables make for a simple, delicious, and unique side dish to serve with any fall meal.  This recipe is hearty, healthy, and pairs well with just about anything.

Vegetable mash is one of my regular go-to weekly recipes, so many herb options and always comfort food!

3. Chuck them in a smoothie

perrysplate.com says

A green smoothie recipe that actually tastes good? Yep. If you’re new or resistant to drinking things like this, this is the perfect green smoothie to break you in. It’s loaded with healthy greens and three kinds of vegetables, and I swear it doesn’t taste like compost.

Many years ago I did an infamous radio interview making a green smoothie on air live!

Lets just say there was green smoothie everywhere!

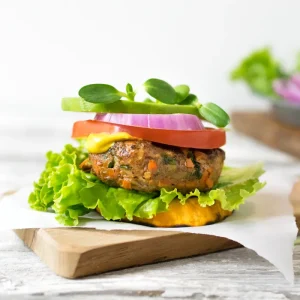
4.      Hide in homemade burgers

Reclaimingyesterday.com says

These burgers are sort of a cross between a real burger and a veggie burger. The veggies allow you to use less meat, plus they add extra nutrients and help flavor the burgers and keep them super juicy. WINNING. These burgers are easy for reals.

This is definitely on my ‘to-try’ list for summer!

5.      Use small vegetable pieces as an alternative rice option

cottercrunch.com says

Learn how to make riced veggies to use in your favorite healthy recipes! Ricing vegetables is quick and easy to do, and it costs less than buying them at the store!

So many great ideas here instead of my usual peas and sweetcorn that I will be adding to my list.

Let me know which ones you tried!

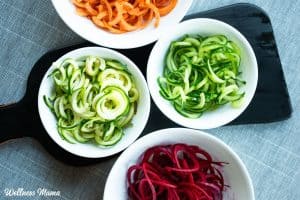
6.      Thinly slice vegetables as an alternative pasta

wellnessmama.com says

Veggie noodles are an awesome alternative to pasta — they’re great if you have a gluten sensitivity and avoid it or if you want to add more vegetables to your family’s diet.

Another great summer/autumn idea I will be addingthey look so beautiful!

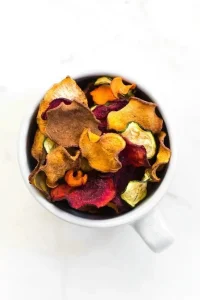
7.      Make vegetable chips and crisps

The bigmansworld.com says

These veggie chips are a Crunchy, crispy and a guilt-free snack that takes just 20 minutes to make! Low in calories and fat, and so much better than store bought.

Don’t these look amazing?

Such a treat!

Don’t forget kale chips too!

8.      Add spinach or greens sheets to lasagne.

foolproofliving.com says

Vegetarian Zucchini Lasagna is a rich yet healthy alternative to traditional lasagna recipes. This low-carb dish uses zucchini “noodles” instead of pasta noodles.

This seems like a simple swap that allows you to enjoy a favourite treat.

And you are adding healthy vegetables!

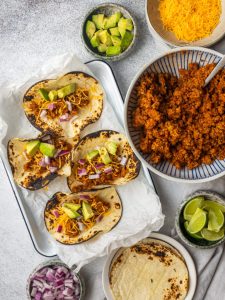
9.      Add finely chopped veggies to favourites like tacos, bolognaise, chilli

madaboutfood.co says

Use this Hidden Veggie Turkey Tacos recipe to sneak some extra veggies into homemade ground turkey taco meat. Your friends and family won’t even know that they’re eating zucchini and cauliflower with their meat.

Perfect way to disguise less than favourite vegetables!

This sounds like a great excuse for a family taco or chilli night?

10. Add vegetables to egg omelette, frittata and quiche recipes

erinliveswhole.com says

Fuel your body in the morning with some high protein and a variety of veggies… All thanks to this flavorful veggie frittata recipe.

Variations of this has been my breakfast option for years – super filling!

I freeze some of the portions ready for later in the week.

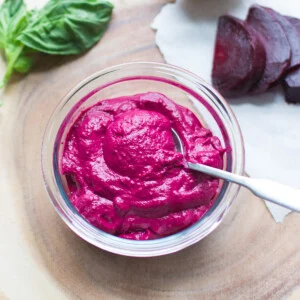
11. Hide in a pasta sauce

mjandhungryman.com say

Made with simple, wholesome ingredients, this beet pesto pasta sauce comes together in minutes and makes for the perfect pasta sauce for babies, kids, and adults!

The colour of beetroot looks so vibrant – can’t wait to try this one!

12. Vegetable tray-bake meals

thehappyfoodie says

Cauliflower, onions and homemade turkey kofta are tossed in a quick spice mix and baked in the air fryer in this simple one basket meal.

Vegetables and Airfryers seem like a match made in heaven!

13. Create vegetable kebabs

foodiecrush.com

says Grilling vegetables skewers seems like a no-brainer, but there are a few tricks to making them a simple success every time.

Definitely need to go check out their grilling vegetable tips!

14. Roast them with delicious seasonings

kimscravings.com says

These are the BEST Roasted Vegetables and my go-to side dish when I need something easy that pairs well with almost anything. 

The flavour options are endless and delicious!

Bake-tray meals are perfect for easy clean-up…

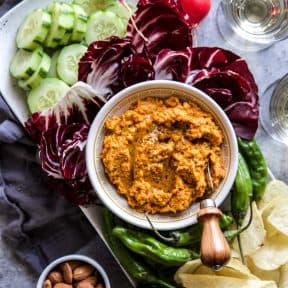
15. Make vegetable dips and hummus.

thecuriousplate.com says

Easy Smoky Carrot Dip is a delicious dip that’s great as a snack and fancy enough as a holiday appetizer!

I am always on the look out for new ideas for dips and such a clever way to hide vegetables!

16. Stuff peppers, sweet potatoes, squash, or courgette

tastesbetterfromscratch.com says

This healthy Vegetarian Stuffed Peppers recipe is packed with rice, beans, veggies, and so much flavor. It will leave you satisfied and energized and are so easy to make!

Such a classic favourite, as I currently can’t eat peppers I could swap sweet potatoes…always options!


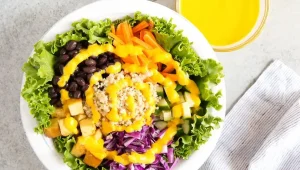
17. Create rainbow salads

shelikesfood.com says

This Beautiful Rainbow Veggie Salad is packed with healthy fruits and veggies and goes great as a side salad or a main dish with some added protein!

How amazing does a rainbow salad look?

18. Create a coleslaw mix

healthyseasonalrecipes.com says

This healthy coleslaw recipe really is super easy peasy to make, and it is completely classic tasting.

Another of my comfort foods……!

The humble cabbage has so many benefits and you can adjust the dressing so it supports your health needs.

19. Quick stir-fries

budgetbytes.com says

We love a good “catch-all” recipe here at Budget Bytes, and a simple vegetable stir fry is the perfect example of that. 

Another family classic!

If you buy or DIY ready prepared vegetables stir fry is a super quick evening meal

20. Easy lettuce wraps

therecipecritic.com says

Healthy and easy, these Chicken Lettuce Wraps are so fresh and delicious! They’re ready in under 30 minutes with a juicy chicken filling and crispy butterhead lettuce.

As someone who has to avoid gluten and wheat it’s easy to forget there are simple veggie alternatives!

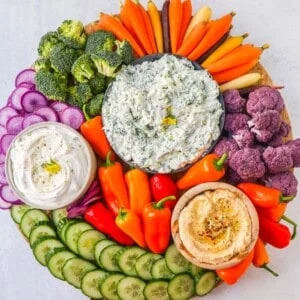
21. Vegetable Crudites & dip

modernhoney.com says

How to make a beautiful Crudite Platter with vegetables and dips. I am sharing my favorite veggie dip recipes, what vegetables to put on a veggie tray, and how to arrange one.

I need to learn how to make my vegetables look beautiful!

22. Throw vegetables on the BBQ

slenderkitchen.com says

Grilled vegetables are the perfect summer side dish! Learn how to grill almost any vegetable from asparagus to zucchini to corn, onions, peppers, potatoes, mushrooms, and more. Delicious recipes, seasoning options, serving ideas, and more. 

Amazing! Now we just need the sun…in the UK

23. Add vegetables to one-pot casseroles (slow-cooker)

tamingtwins.com says

Slow Cooker Beef Stew or Slow Cooker Beef Casserole? Whatever you call it, it’s comfort food at its very best. A hearty meal packed with flavour, vegetables and rich gravy for the whole family.

Stews or Casseroles are real comfort food in my home.

And so easy to hide a few veggies!

24. Make vegetable dressings and seasonings

forksoverknives.com says

Fresh carrots combine with a touch of tahini in this nutrient-rich, creamy carrot-gold-dressing. The hint of ginger adds a beautiful flavor boost. Try this on grains, too!

One I will be trying!

25. Vegetable noodles

loveandlemons.com say

Did you know that you can make veggie noodles out of cucumber, carrots, kohlrabi, and more? We’ve all heard of zucchini noodles by now, but lots of other vegetables can transform into curly, colorful noodles too! 

How colourful do these look? pretty sure they would transform a noodle bowl recipe!

Ready to join the challenge?

Whether you join us for the 28-day eat more vegetable challenge or not I hope you found this list of 25 creative ways to add more vegetables into your meals inspiring and helpful.

Self-care shouldn’t feel overwhelming. This FREE Challenge Toolkit gives you the steps to start—and stick with—your first challenge.

Free beginner-friendly guide!

“It’s 100% free—no strings attached.”

Do you struggle to drink enough water — even though you know how important it is?

You’re not alone! I created this simple and realistic 28-Day Drink More Water Challenge for those of us who know we need to hydrate but somehow never quite manage to make it stick.

After 25 years as a natural health practitioner, I can honestly say that drinking enough water is one of the simplest — and most powerful — acts of self-care.
But simple doesn’t always mean easy.

This challenge is here to help you build a small, consistent habit that makes hydration effortless — and actually enjoyable.

Jump to Recipe

The Intention

To gently reintroduce your body to regular hydration and create a rhythm that feels natural.
Like all Make Self-Care Simple challenges, you’re encouraged to adapt it to fit your own energy, lifestyle, and body’s needs.


Try this Challenge If:

  • You suspect you don’t drink enough water
  • You find water boring or forget to drink regularly
  • You struggle with fatigue, headaches, or sluggish digestion
  • You want a simple, low-effort self-care habit that makes a big difference

(Tip: I find this challenge especially helpful in the cooler months when it’s easy to forget to drink.)


Pin for later ?

What Is the Drink More Water Challenge?

Over the next 28 days, you’ll track and celebrate the days you meet your personal water goal.
You’ll start small — just five mini “sips” a day — and see what changes you notice in your energy, skin, and focus.

By the end of the challenge, you’ll have clear feedback on how hydration affects your wellbeing — and you’ll decide if you want to make it part of your regular routine.


Why Water Matters

Water supports nearly every function in your body — from energy and temperature regulation to digestion and brain function.

Even mild dehydration can affect your mood, concentration, and metabolism. Over time, it can also put stress on your kidneys and joints.

So, a little consistency really does go a long way.


How Much Water Do You Need?

There’s no perfect number. Everyone’s needs are different and depend on:

  • Temperature and weather
  • Activity level and sweating
  • Age, gender, health, and medications

Instead of chasing a fixed target, this challenge focuses on habit and awareness.
You’ll simply notice how your body feels as you drink more regularly.


Check-In Before You Begin

Spend one day observing how much you currently drink. Include everything — tea, coffee, smoothies, juice, and water.
Then ask:

  • How much of this is pure water?
  • How do I feel (energy, mood, focus, skin, digestion)?

You’ll use these notes to compare your “before” and “after” once the challenge ends.


The Simple 28-Day Drink More Water Challenge

For the next 28 days, drink at least 100 ml (about 3 fluid ounces) of plain water at these times:

1️⃣ Upon waking
2️⃣ Before breakfast
3️⃣ Before lunch
4️⃣ Before dinner
5️⃣ Before bed

That’s just five quick moments a day — about two big gulps each time.
Over 28 days, that adds up to around 14 litres (24½ pints) of pure water.

This is in addition to your normal beverages.


Why This Works

  • Small = achievable. 100 ml at a time feels easy, which helps you stay consistent.
  • Timing = benefit. Drinking before meals supports digestion and helps prevent overeating. Drinking on waking and before bed supports detox and hydration overnight.
  • Habit stacking = success. Pairing water with things you already do (like meals or brushing your teeth) helps make the habit automatic

Can I Drink Warm or Hot Water?

Yes! It all counts — cold, warm, or hot — as long as it’s plain water (no flavourings or sugar).
Some people find warm water easier to drink in cooler weather. Experiment and notice what feels best.


Want to Take It Further?

If this feels easy, you can gently increase:

  • Drink 150–200 ml each time instead of 100 ml
  • Or add another 100 ml after every bathroom break

You’ll get even more benefit without feeling overwhelmed.


Tracking Your Progress

Inside your toolkit

Tracking makes this more fun — and motivating!

Use your Drink More Water Tracker from the Free Self-Care Startup Kit or simply tick off each day in your journal.
After 28 days, compare how you feel.

Common improvements:

  • More steady energy
  • Clearer skin
  • Better digestion and regularity
  • Fewer headaches
  • Improved focus and less fatigue

If you don’t notice much change, that’s okay — it might mean your hydration was already good, or your body needs more time. Either way, awareness is progress.


Reflection & Integration

After 28 days:

  • Review your “before” and “after” notes
  • Notice small wins — even subtle ones
  • Decide if you’d like to continue or increase your daily intake

Remember, consistent small habits make the biggest difference


Final Thoughts

Congratulations on completing your 28-Day Drink More Water Challenge!
You’ve just strengthened one of the most foundational self-care habits there is.

Keep listening to your body, keep your water nearby, and keep it simple.
Your body will thank you with better energy, clearer skin, and a brighter mood. Why not invite a friend to join you next month? Small habits are easier (and more fun) when shared.

Ready to make your self-care simple and consistent?

Start your self-care journey with clarity and confidence.

The Free Self-Care Start-Up Toolkit gives you everything you need to set yourself up for success before you begin your first challenge.

Inside, you’ll discover:
🌱 A simple Before Assessment to understand what your body and mind need most
🌿 A guide to the Four Self-Care Pathways (Practical, Nourish, Mindcraft, Align & Uplift)
💧 How to choose your first challenge and track your results
🪞 Reflection prompts and planning sheets to stay consistent

You’ll also receive:
✉️ Weekly self-care reminders and new challenge ideas in the Make Self-Care Simple newsletter
💬 Access to our private community — where women share insights, celebrate wins, and stay motivated together

👉 Get Your Free Toolkit & Join the Community

(Part of the Practical Self-Care Pathway — build habits that support your body’s natural balance.)

Freebie-make-selfcare-simple
discover your selfcare blueprint

28-Day Drink More Water Challenge

Prep Time1 day
Total Time28 days

Notes

28-day Drink More Water Challenge

Goal: Build a simple daily hydration habit
Duration: 28 days
You’ll Need: Water, glass or bottle, tracker or journal
Steps:
  1. Track your current intake for 1 day
  2. Drink 100 ml at 5 key times (morning, before meals, before bed)
  3. Log your progress daily
  4. Compare your before/after notes at the end
  5. Optional: Increase amount or frequency after week 2

Week 4 of my Long Covid, Histamine & SIBO journey I discover that the combined low histamine and fodmap diet can cause new symptoms – and that one of them might be good news!

New Symptoms on low Histamine & Fodmaps Diet

My restrictive low fodmap (sibo) and histamine diet definitely helped improve the uncomfortable bloating, gas and stretched feeling in my upper stomach.

Although there is still a fullness and slight swelling in that area – I guess housing all those bacteria requires extra room?

And I know from experience that my histamine reactions would be far worse and more frequent if I didn’t avoid the high histamine foods.

So I am definitely confident the diet is supporting my histamine and sibo symptoms while I work on healing the root causes.

However I did start to notice two new symptoms which I think were caused by the diet.

Please note this is my personal journey, not medical advice

Just landed on this page?

You can start from the beginning HERE or Week 3 HERE

Starving Intestinal ‘bad’ Bacteria through Diet

The diet is designed to starve the bacteria of the foods they love to feast on – carbohydrates and yeasts. ** There is no scientific proof of bacteria starving but it feels real when you go through it!

Bacterial signalling is when the bacteria signals your brain that it needs and craves sugar – it can make you feel desperate and emotional – but is really just the bacteria controlling you..

Anyone who has struggled with candida overgrowth will recognise this situation.

Between weeks 3 and 4, I really started to notice cravings. Random images of my favourite past treats – chocolate – kept popping into my head with the emotion of ‘its not fair’ being triggered.

To be fair my diet had been low sugar for quite a while as any refined sugar – even natural stevia, maple syrup, honey, xylitol, and coconut sugars caused horrible skin rashes and boils over my face.

Luckily I am just vain enough to be horrified and quickly remove as much sugar as possible.

** Strangely enough Agave syrup did not cause a histamine reaction – but am sure it is high fodmap and feeds those pesky bacteria.

Instead of succumbing to chocolate (remember the boils!) The cravings sent by the bacteria strengthened my resolve.

I was glad the bacteria were starving, getting weaker.

Because bacteria robbing me of all my nutrients meant I was also getting weaker.

This can slow your Gut Motility (Sluggish Bowel)

The combined low fodmap (sibo) and histamine diet includes resistant starches such as potato, rice, quinoa and oats.

Oats

Resistant Starches are considered beneficial for people with Sibo and IBS as they bypass the small intestines and feed the good bacteria that you need in the large intestines. They are also said to improve the gut barrier and reduce gut permeability.

This is all great.

Just be aware that resistant starches can slow your gut motility – slow your bowel transit time or even cause constipation.

I had enjoyed eating sweet potatoes but the 75g portion size (cooked) had felt challenging to stick to and if you go above this amount sweet potato becomes high fodmap and feeds the bacteria.

Same with oats, I love them, but have noticed that my portion size can creep up.

My typical low fodmap (sibo) & histamine meal plan included one resistant starch and a protein with some of the limited vegetable choices at each meal 

This combination of starch and protein caused my normal transit time to slow right down.

Now for some people a slower bowel transit time would be no problem at all!

But I needed a good transit time because of a crucial new remedy I was keen to begin using. This remedy was known to slow the bowel transit time and yet to work effectively needed to not hang around in the colon for too long.

**More on this new remedy in week 5!

This week was spent exploring how to ease constipation and sluggish bowel naturally – especially when you can’t tolerate or take the usual OTC medications and remedies. It proved so helpful that I turned it into a simple challenge you can try yourself – see HERE.

I almost missed this Obvious Tactic!

In between encouraging my bowel to work better and dealing with bacteria signalling I almost missed an obvious tactic.

DAO  – Diamine oxidase – is an enzyme that breaks down histamine in the stomach. About 9 months ago I started taking one capsule each morning and it acted like a miracle in reducing the intensity and frequency of my reactions.

As I mentioned before, there is only one brand that suits my body, and honestly it is quite expensive.

As I was searching for more solutions and answers I suddenly realised that maybe I needed to take a 2nd DAO capsule before my evening meal?

Sometimes we almost miss the obvious!

Medical Patient Drug Care Concept

Why More is not always Good

Reducing my intense histamine reactions was a big relief – because the constant reactions impacted my energy levels, cognitive ability, general weakness not to mention potential damage to my eye-sight and vagus nerve. 

However the fact that I needed more DAO was not great news 

One negative was that I would need to order double the amount of expensive tablets!

The other negative was that needing a 2nd DAO Enzyme indicated that my digestion was getting weaker.

This made sense as my diary shows that I was having histamine reactions 4 – 5 days a week and those reactions were to foods/scents etc that previously I had been able to tolerate.

On the days that I remembered to take this 2nd capsule my reactions were milder. I kept forgetting to take them before my evening meal and they don’t work after you’ve eaten. 

My daughter got fed up with her forgetful mum and took action

So now if you meet me late afternoon and hear angry barking – it is just my mobile phone reminding me to take the blasted 2nd DAO!

Summary of week 4

  • Bacterial Signalling – shows up as cravings – and is a positive sign that your diet is starving the bacteria.
  • The restrictive low histamine & Sibo diet can mean that your meals include a larger % of resistant starches with protein which in some people can cause a sluggish bowel
  • Needing to take more DAO Enzyme is a sign that my digestion is getting weaker
  • In order to prepare for a new remedy I need to ensure my bowel has every support I can provide (and tolerate)

Interested in Natural Self-Care?

Hope you found my own (far from perfect) journey helpful on some level – even if it’s just reassuring to know you are not alone on the ups and downs of caring for your body and health!

Why not discover how I use Self-care to support my own journey and explore all the free support that’s included?

This is my personal journey to heal myself from both SIBO and Histamine Intolerance that were part of my Long Covid diagnosis. In this blog post I share what I did next after recieiving a positive test for SIBO. Including what I could eat on a low fodmap histamine diet.

I was so relieved to finally have a concrete diagnosis after taking the SIBO test. After years of being told my results were ‘fine’ and ‘normal’, even though I didn’t feel fine or normal a positive results for Hydrogen SIBO felt like progress.

Of course I couldn’t know what was ahead of me – but I remember feeling positive and hopeful.

Histamine intolerance – really overload – (reactions) causes me various unpleasant and unexpected symptoms and SIBO explained a new uncomfortable swelling in my upper stomach – both conditions are linked to each other and Long Covid – you can read more HERE

The private test I paid for included not only the test results, but a 7-minute personal video and healing plan.

My results took about 2 weeks to come back and I made the most of this time.

I spent a lot of this time researching and making lists of foods that are low in both histamine and fodmaps (SIBO)

There is a LOT of information about foods, diet and recipes for low Histamine OR FODMAP but very little about what to eat when you need foods that are low in both!

My low fodmap histamine foodlist list was not very long.

Blueberries are about the only fruit. The only sweetener I could find was pure stevia drops (which I reacted to) or tiny amounts of Maple Syrup.

Nutbutter is essential for many of my recipes and the allowed list includes Pecan (quite bitter) Macadamia nuts (lovely!) and Hemp and Pumpkin seeds.** Check amounts and individual sensitivity. This is enough to enjoy milks, dressings, smoothies and treats!

Potatoes, parsnips, swedes, courgettes, broccoli, carrots, lettuce, kale and cucumber are the main vegetables. Onions are problematic, you can test just the green part of spring onions and leeks, and garlic olive oil.

Rice, oats and quinoa make up the grains. I struggle with rice.

Plain cook from scratch meat, fish and maybe eggs are OK – but if they have anything added they are not allowed. Also you have to freeze and defrost just before you cook. No left-overs hanging around. I had to avoid eggs and my weekly shop included (plain) roast turkey, chicken and salmon. With occassional red meat.

Olive oil and Ghee are both acceptable to cook with. I did get myself some garlic olive oil but had to only add drops to avoid any reaction. I read that full fat Mayonnaise is OK in small amounts ? – I found a brand that I tolerated (thank goodness) watered down to start with.

Vinegar and lemon juice are high in histamine and fodmap and after a lot of research I got myself Verjus** – sour unripe grape juice which in small amounts might be tolerated and tastes like a mellow vinegar.** Update I started to react

Many spices are high histamine and some herbs are high fodmaps so you have to proceed with caution.

Ginger is your best friend for flavour and to soothe your symptoms, to this you can add Turmeric, Cardamom and Lemon Grass.

Chamomile and Hibsicus and many other herbal teas are not allowed. But a pinch of dried herbs as seasoning I think is ok.

Is low histamine and fodmap Foodie Hell?

When I was researching how limited my food choices were – it did feel like foodie hell.

But I decided to focus on what I could eat and how I could adapt traditional recipes.

This was definitely a time to work on my mind-set because any hope of healing was on the other side of weeks/months of this diet.

They call it delayed gratification, go without now so you can enjoy later on.

This was not my forever food plan.

Aim for 90% Clean Eating

I aimed for 90% Clean. I included 2 weak cups of green tea, also a dash of almond milk twice a day in my rooibos tea. Once a week I had a Thai green curry and took an extra DAO capsule as I had already found that my body did not react to this. To start with I had watered down full-fat mayonnaise.

The problem is that I was reacting a LOT to things like body products, scents, chemicals, pollen and supplements.

Which wiped me out and while the diet is hugely beneficial it does take effort which you might not have in the beginning

Which is why, despite not being a good cook at all, with questionable taste buds, I have decided to share my recipes.

My Low Histamine/Fodmap Weekly Meal Plan

So here is my simple weekly food plan that is BOTH low histamine and fodmap – suitable for those suffering Histamine overload allergies and intolerances, MCAS, SIBO, Bacterial overgrowth, Gut Issues, with Fatigue

**I’m not a cook – so no measurements or detailed instructions!!!

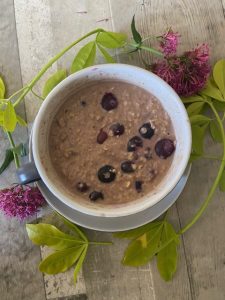
Oats with Blueberries

Low fodmap histamine blueberry macadamia nut oats

I make an overnight oats version that only soaks for a couple of hours or heat gently and serve

  • I soak the oats and blueberries in ginger tea
  • I add macadamia or Pecan nut butter
  • Swap oats for rice flakes or quinoa
  • Add Stevia or maple syrup to taste

**I can’t tolerate stevia, and find macadamia nut butter sweet enough – but will add a tiny drop of maple syrup with Pecans which I find bitter

Blueberry Smoothie

More or less the same as oat recipe but I replace the oats with allowed greens such as lettuce, cucumber, kale.

Simply blend with cold ginger or mint tea.

This is very useful if the bowel slows down.

Salad, Protein and Potato

Low fodmap histamine spanish egg frittata

This is low fodmap histamine Spanish frittata – eggs and potato with lots of herbs **If you can tolerate eggs

I have potato/protein most days with a large salad!

  • Potato can be oven chips, jacket spud, new potatoes
  • Protein can be allowed plain poultry, meat or fish, frozen then defrosted in portion sizes.
  • Eggs – if tolerated
  • Salad is lettuce, shredded cabbage, cucumber, grated carrot

Finding a low histamine/fodmap salad dressing is almost impossible! I found that I can tolerate watered down shop-bought mayonnaise. You can use extra virgin olive oil with salt and pepper (helps with constipation). All vinegars and citrus are high histamine – some people can tolerate apple cider vinegar or distilled white vinegar. And most fruits are high fodmaps.

** Fresh lemon juice will be one of the first foods I ‘test’ back into my diet

Vegetable & Protein

So the goal here is to eventually find a gravy or sauce that you can tolerate.

Protein is again from the allowed plain poultry meat or fish list – frozen and defrosted in portion sizes. Eggs if tolerated. My choices include chicken, salmon, turkey with occassional lamb or beef.

My vegetable choices, which I mix and match include:

  • Broccoli and Carrots
  • Parsnip mash
  • Swede and Carrot mash
  • Sauted Cabbage
  • *Kale – to be included
  • *Roasted Radishes – to try!

If tolerated you can add ghee or drizzle olive oil. I season the vegetable water and add herbs and then save some when I drain the veg to make the mash or as a ‘jus’. Or you can save your protein juices as a ‘gravy’. I have found that I can tolerate shop-bought stock and gravy – after first taking a break and then ‘testing’.

Low fodmap/histamine Pesto/dressing

I didn’t want to leave you without sharing this idea! Parmesan and lemon juice are not low histamine or fodmap, nor is yeast flakes.

A low fodmap/histamine Pesto made with:

  • Fresh Basil, Mint, Parsley or Coriander (Cilantro) leaves
  • Macadamia or Pecan nut(butter), or Hemp seed or Pumpkin Seed
  • Extra Virgin Olive Oil or garlic infused oil
  • Seasoning (Opt chopped green onion leaves or chives)

Blend everything except the oil, which you add slowly. This can be adjusted to use over salad or meat and veg. When I’ve experimented a bit more I will share better details!

Simple Selfcare Tip!

Cook in bulk and freeze in portion size. There will be days when you feel too poorly to cook. Or days that go wrong when you have no time. Trust me it’s worth bulk cooking on ‘good’ days.

I plan to add more recipes but hope this provides ideas to get you started.

Next find out what my first steps were after testing positive for SIBO in week 2 HERE

If nothing else I hope this gives you an idea of what to expect if you suspect Histamine SIBO is the cause of any of your symptoms. Check the start of my journey here.

Developing a self-care practice around my personal healing journey was not only a powerful tool but incredibly empowering. Why not let me help you create your own menu of self-care practices?

There are literally hundreds of self-care practices you could start tomorrow, but how do you decide which ones are worth spending your time doing?

 When you decide to invest precious time, energy and money on your well-being, especially when you are coping with ongoing health conditions, it is worth spending a couple of minutes answering a few questions before you decide if this new self-care is worth exploring.

In the last decade the internet has been buzzing with thousands of healthy choices, ideas and opinions that promise to transform your health. 

This has become a vast resource that is often freely available to everyone who is seeking answers and options.

 On the other hand too much choice can become overwhelming, especially when supporting your health has become an essential factor in your life.

My aim with this blog is to make selfcare simple and help you find the self care practice that gets you results.

To get started I have put together 7 questions to ask before starting a new self care practice.

I have used both my experiences as a natural health practitioner and personal health journey to help explain how to use each question.

Short on time?

If you just want to skip straight to the questions click to the summary at the end.

Benefit of a Clear Strategy

My own self-care practice has changed over the years, depending on what was happening in my life and health journey, and the results I achieved was down to always having a clear strategy behind each self care practice I included.

 In other words, I always know exactly what result I expect to experience from any self-care choices I made.

 In my Natural health clinic, I helped hundreds of clients over many years to create individualised self-care practices.

 In this article I want to help you get started, by sharing questions to ask before starting a new self-care practice.

What is the definition of Self-Care?

Who defines self-care as:

 “Self-care is the ability of individuals, families and communities to promote and maintain their own health, prevent disease, and to cope with illness – with or without the support of a health or care worker.”

 My aim with any self-care practice is to provide one of the following:

  • Improve my current health levels
  • Maintain good health levels
  • Prevent future health issues
  • Better cope and manage existing illness.

A self care practice goes a little deeper than a healthy lifestyle, it is specifically fine tuned to the needs of your individual body and health needs.

Lets dive into the 7 questions to ask before starting a new self-care practice.

1. What benefit can I expect to experience or see?

This is the important question. Will following this self-care practice benefit and improve your individual health levels?

It might sound obvious but in the clinic I had clients spending time and money on popular health practices and products that they did not need. And because their body did not need it, they never experienced the same results as other people.

 Which can leave you feeling frustrated and wondering ‘what is wrong with me?’ or ‘what am I doing wrong?’ or that it doesn’t work and was a waste of time.

 Seeing someone else getting results is a very powerful motivation especially when you are struggling.

 ‘It worked for me, so I’m sure it will help you too’.

 Is a well-meaning phrase, but often a bit of a red herring when it comes to self-care.

The reason why there are so many solutions and none of them work 100% for every person is because you are not an exact copy of everyone else – you and your body are unique and individual and so are your health needs.

Knowing what support your body most needs right now is an important guide to which self-care practices to consider. 

If you don’t know – that should be your first self care practice – to understand your health condition better. 

Start with simple basics and know that as you learn more about your health conditions your self care practice will become more individual and tailored to you..

  For instance, a mindfulness practice to help soothe anxiety would not be the most important part of my own self-care, as I am quite relaxed and calm naturally.  It’s possible I would not notice any positive changes to my health levels.

 But for someone who suffers with anxiety the benefits become much more valuable and they are likely to notice and experience incredible improvements.

 Check what benefits to expect with each self-care practice you consider. Then decide if you, your body and health situation need them.

2. How soon before I can expect to feel/notice the benefits?

Some self-care practices feel good as soon as you do them, but the benefits only last a short while. Others take longer to build up and change the body, so it may take longer to experience the results.

 Admittedly this question has many variables, mainly because each person is unique. You may not be able to answer this question exactly until after a bit of trial and error.

 The reason why I like to have a rough idea of how soon to expect results is so I can monitor which practices are working well and which ones I need to swap out.

 My goal is always to get the best health benefits, in the shortest, easiest and most enjoyable ways possible.

Life is far too short to be spending 15 minutes every single day on a self-care practice that makes very little difference to my well-being. Or spending £10 a week on a product that does nothing to reduce a symptom.

In one year that would mean 5475 minutes or 91 hours or £520 of wasted time and money!

 As a rule of thumb if I don’t notice a difference after 1 month, I consider stopping that practice.

I can say this confidently because I know which Self-Care Blueprint I have.

Discover your body's response style
discover your selfcare blueprint

To answer this question you also need to be realistic.

No selfcare practice will give results unless you are consistent.

Do not expect a complete recovery in 1 week or month, the aim is to notice small improvements and changes.

 It is super helpful and motivating to know exactly what benefits I receive from each self-care practice I follow.

For instance, after completing just one 10–15-minute Qi Gong practice, I know that I will feel immediate improvements to my stiff and painful neck, a general ease of movement and serenity in my mood.

Consistent practice not only improves my body, mobility and mood, but I also experience the electromagnetic fields and vibrational frequencies of Qi Gong.

And I also know (from experience!) that after 3 days of missing that daily practice my neck will slowly seize up. More than a week of missed practice results in increased aches and pains all over my body. Ouch!

 On the other hand, the green supplement powder I use has a more subtle benefit. Over the years I have stopped it and found that at about 6 weeks I noticed a definite dip in my energy levels that I can only regain through my green powder.

Many self-care practices build up slowly over regular use.

 I hope my personal examples show how helpful it is to understand the timing factors for each self-care practice you follow.

how-much-time-make-selfcare-simple

3. How much time will this take to do each day/week?

Currently I work full-time, blog on the side and follow a daily self-care practice morning and evening. I also have a daughter, dog, home & garden, and family member commitments…I am busy!

 Time is extremely valuable to me.

If there are two practices that offer the same benefits, but one can be done in 5 minutes while the other one requires 50 minutes, I take the 5 minutes every time.

 No matter how great the longer practice is, it won’t help me if I never have time to do the practice!

 Knowing how much time a practice requires, is one easy way I decide which practices to include and which to leave.

 Another question I often ask is ‘can I get enough benefits in less time?’

Of course sometimes that 50-minute practice really is the best option, and acknowledging this first will help you make the time.How important is time for you?

how-much-planning-involved-make-selfcare-simple

4.  How much preparation or planning is involved?

Following certain diets and recipes that support my health often require hours of prep and planning.

I class healthy eating as self-care. For me it is a priority, so I factor in the extra time it takes to prepare my meals in my selfcare planner.

 Because I have (currently undiagnosed) MCAS symptoms and can experience extreme reactions to foods, I often don’t have a choice, so I research and explore all the prep and planning hacks and adapt them to suit my needs.

Honestly this has taken me hours and hours.

As a general rule my goal is always to get the best health benefits, in the shortest, easiest and most enjoyable ways possible.

But for my personal health issue, weekly hours spent on meal prep is essential, even if I don’t always enjoy it.

 You might come across a self-care practice with lots of benefits that requires a fair amount of prep or planning.

 Do the benefits justify any additional preparation and planning of a self-care practice?

 Another example would be a gym membership. There is no doubt that there are many benefits to a regular gym work-out, but many people struggle with fitting in the extra time requirements involved in travelling to and from the gym in their busy lives.

If the thought of all that additional time spent on prep and planning gives you that sinking feeling that could be a sign that for now you need self care that is simple and easy.

5. What additional costs are involved?

Most self-care practices require some kind of cost. Especially when you first start and are getting set up.

 I am quite frugal by nature and circumstance so it’s important to me that I am getting good value for any costs.

 I have found that many of the very best self-care results cost next to nothing!

 Sometimes an additional cost is worth it.

 A higher cost should save you:

  • Time,
  •  Provide better user quality,
  •  Results you can’t receive from other options.

The good news is that if you are prepared to allocate more time and effort a great deal of self care is affordable. Check out my self care challenges for ideas!

6. How much effort is required?

 For those of us suffering with low energy and fatigue asking how much effort is required can feel like a daily mantra!

This is when it helps to get honest about your energy levels, brain fog and motivation.

Every self care practice will involve some level of effort, simply because any change to your routine requires effort in the beginning.

 If the effort required leaves you feeling drained, that is a potential red flag.

 If you find yourself ‘avoiding’ or ‘forgetting’ it can be helpful to do some further self-enquiry as to what is really happening.

 Often the first week of a practice feels easy because we are motivated, but by the next week it can start to feel like hard work!

 Having to turn out and drive to an evening yoga class may feel like too much effort for one person while another will make time to experience the amazing instructor and group energy.

 Once you accept that any new self care practice is going to take a certain amount of effort, you just need to ask…

Is the effort worth the value you would receive?

7. Do I enjoy the practice?

I’ve saved this question until last even though I know it is possibly the first one you might ask!

 When you find a self-care practice that you enjoy, and which provides the lasting benefits your body needs you have found healing heaven.

 Sometimes when something starts to feel easier it becomes more enjoyable. Take yoga or meditation. Typically, these are not easy or enjoyable at the beginning. But after regular practice you become a raving fan!

 There is also a place for self-care that provides enjoyment as the main benefit – good to know right? I always try to include these in my day!

 Then there are ways you can make a self-care practice more enjoyable.

 Perhaps you can turn down the intensity, shorter the duration.

 The benefits may take longer but if you enjoy the practice more you will keep going.

Final Summary

So that completes my 7 Questions to ask before starting a new self-care practice. You can use these to help you choose your next self care challenge.

It is my hope that these questions will help reduce any confusion and overwhelm when faced with so many different options.

In summary:

7 Questions to ask before starting a new self care practice.

  1. What is the benefit I can expect to experience or see?
  2. How soon before I can expect to feel/notice the benefits?
  3. How much time will this take to do each day/week?
  4. How much preparation or planning is involved?
  5. What additional costs are involved?
  6. How much effort is required?
  7. Do I enjoy the practice?

Hope you can join me as I have a LOT more support to offer around self-care!